



Power outages don’t wait for convenient timing, and rising utility rates make backup power feel less optional every year. If you’re weighing a home battery installation for your New England property, you’re likely facing a maze of equipment options, permit requirements, and cost estimates that shift with every quote. This guide cuts through the noise. We’ll walk you through what to budget, what to ask installers, and how to plan a system that actually fits your home’s needs in 2026.
Why Homeowners Are Investing in Home Battery Installation
Energy Independence and Resilience
Utility rates keep climbing, and New Jersey has seen its share of increases in recent years. That trend alone pushes a lot of homeowners toward battery backup. But it’s not just cost. The grid itself feels shakier than it used to, especially during storm season. Reliability has become the real selling point.
New Jersey knows storms. Nor’easters, hurricanes, ice storms — they knock out power for hours, sometimes days. A battery keeps your fridge running, your sump pump working, your lights on when the block goes dark. That’s a real safety issue for anyone with medical equipment or a finished basement prone to flooding. Waiting until a storm’s forecast to think about backup is a bad plan. Batteries need to be sized and installed well before hurricane season starts.
Beyond storms, there’s a simpler motivator: control. Homeowners like knowing they’re not fully dependent on the utility company for every kilowatt-hour. Pairing storage with solar takes this further, letting you store midday sun and use it at night instead of selling it back cheap and buying it back dear. If you’re weighing panels at all, it’s worth first understanding whether are solar panels worth it for your specific roof and usage before adding storage on top.
How Storage Complements Broader Home Energy Efficiency
A battery works best inside a house that isn’t wasting energy. If your attic leaks heat and your fixtures are outdated, you’re just storing power to burn it inefficiently. Attic insulation, caulking, and weatherstripping shrink your baseline energy demand. That means a smaller, cheaper battery can cover more of your needs during an outage. Sequencing matters here.
The same logic applies to appliances. Older water heaters, boilers, and dishwashers draw more than newer efficient models, so home appliance replacements often make sense before or alongside a storage project. Swapping in LED light bulb replacement and low-flow showerhead and aerator upgrades trims demand further, at a fraction of the cost. Every watt you don’t need is a watt your battery doesn’t have to supply during a blackout.
This is where many local businesses see the strongest return: efficiency work first, storage second. For anyone retrofitting an existing solar array, reviewing guidance on Adding a Battery To a Solar System can clarify compatibility and cost before committing. It’s a smarter order of operations, and it stretches your budget further than jumping straight to the flashiest tech. If you’re unsure where your home stands, reviewing our services for an efficiency-first checklist is a reasonable starting point.
Pre-Installation Planning: Sizing Your System Correctly
Calculating Your Household Energy Needs
Before you fall in love with a specific battery model, pull twelve months of utility bills and find your daily average kWh use. Most homes land somewhere between 25 and 45 kWh a day, but yours could be higher if you run electric heat or a pool pump. That number, not a salesperson’s estimate, should drive every sizing decision that follows.
Bills only tell part of the story, though. They show totals, not timing, and timing matters when you’re deciding how many battery modules to install. A professional energy audit digs deeper, measuring actual consumption patterns room by room and appliance by appliance rather than guessing from averages. That kind of detail often uncovers surprises, like a decades-old refrigerator or water heater quietly driving up your baseline load. Pairing the audit with targeted home appliance replacements can shrink the battery size you actually need. Reading an essential guide to home solar batteries alongside your audit results helps translate raw numbers into real capacity decisions.
Partial-Home vs Whole-Home Backup Goals
Decide early what you’re actually protecting. Partial-home backup covers critical loads: refrigerator, well pump, medical equipment, some lighting, and a few outlets. Whole-home backup covers everything, including your central air and electric range. It’s the difference between riding out an outage comfortably and riding it out at all. Whole-home costs more upfront, obviously, but it’s less to think about later.
Whichever path you choose, think ahead five to ten years, not just next winter. Planning an EV purchase or a heat pump conversion? Those additions can double your daily load, so undersizing now just means an expensive retrofit later. It’s also worth handling smaller efficiency fixes, like caulking, weatherstripping, and attic insulation, before finalizing battery capacity, since a tighter building envelope lowers the load your backup system has to carry. Many of these overlap with broader projects to improve energy efficiency, which is why sizing conversations often start with a whole-house review rather than the battery alone. Even small, unrelated upgrades, like better window treatments for insulation, factor into the bigger picture. Browsing options such as curtains suited to New Jersey homes is a reasonable side project while you plan.
Comparing Battery Chemistries and System Configurations
LiFePO4 vs Other Chemistries
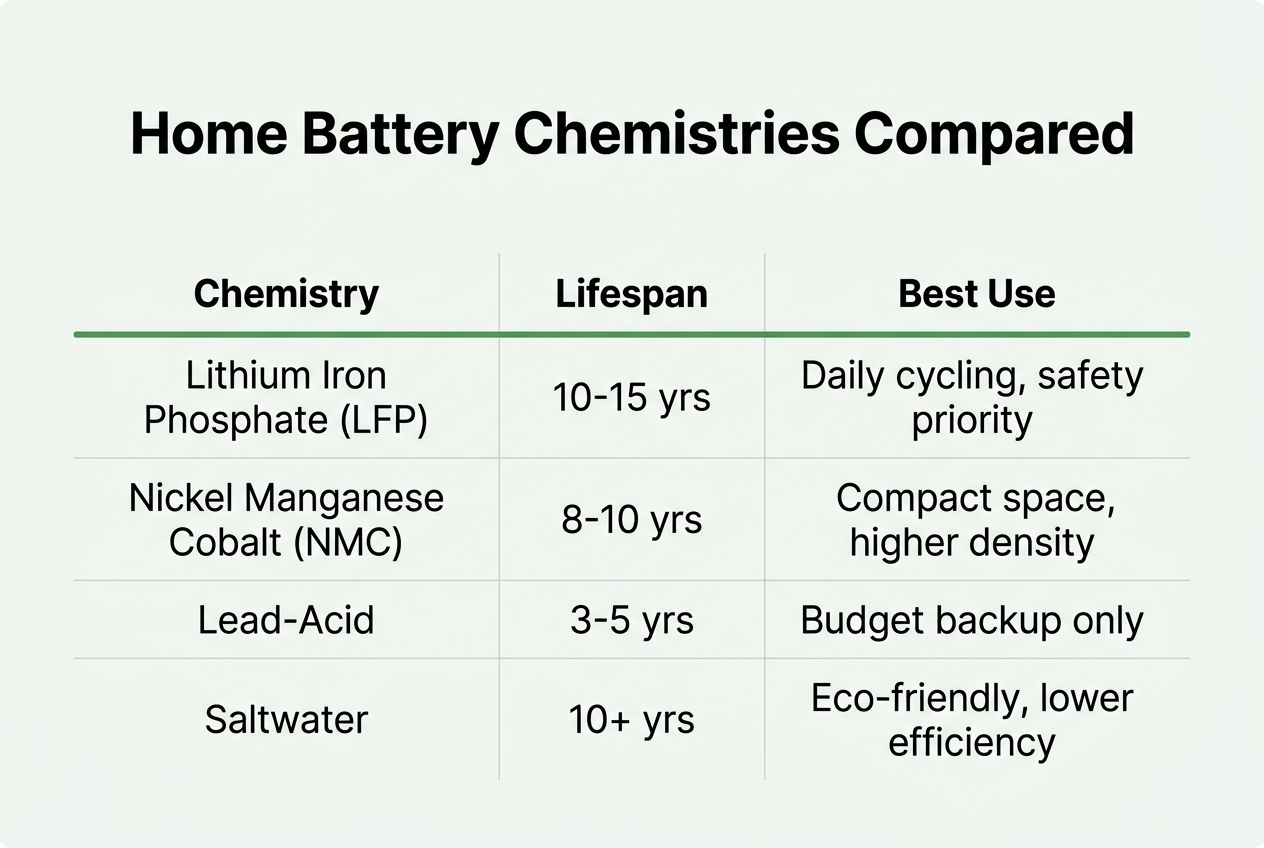
Most residential systems sold today use LiFePO4 (lithium iron phosphate) chemistry, and for good reason. It runs cooler, resists thermal runaway better than older NMC lithium formulas, and typically holds up for 6,000 or more charge cycles before capacity drops off. NMC batteries pack slightly more energy into a smaller box, but they degrade faster and carry a higher fire risk profile. Lead-acid still shows up in bare-bones off-grid cabins and budget setups, mostly because it’s cheap upfront. It won’t last, though. Expect 3-5 years versus 10-15 for LiFePO4, and you’ll need to replace it more than once over a system’s life.
| Chemistry | Typical Cycle Life | Depth of Discharge | Thermal Safety | Common Warranty |
|---|---|---|---|---|
| LiFePO4 | 6,000-10,000+ | 90-100% | High | 10 years |
| NMC Lithium | 2,000-4,000 | 80-90% | Moderate | 7-10 years |
| Lead-Acid (AGM) | 500-1,200 | 50% | High | 3-5 years |
| Saltwater | 3,000-5,000 | 85-100% | Very High | 10 years |
AC-Coupled vs DC-Coupled Systems
This choice matters as much as chemistry. AC-coupled systems tie into your home’s existing wiring after the solar inverter, which makes them far easier and cheaper to retrofit onto a solar array you already own. DC-coupled systems connect before the inverter stage, squeezing out a few extra points of round-trip efficiency, but they usually demand a new hybrid inverter and more rewiring. That’s a bigger job and a bigger bill. For anyone comparing options from scratch, reading through solar battery installations: the complete overview helps clarify which setup fits an existing array versus a new one. Round-trip efficiency, by the way, varies by product, often 85-95%, so ask for the number rather than assuming.
Physical and Electrical Installation Requirements
Siting the Battery System Safely
Where the battery goes matters more than most homeowners expect. Garages, basements, and exterior walls are the usual spots, but each comes with trade-offs. Basements stay cool and stable, which batteries like, while exterior walls need extra weatherproofing and, in colder climates, some form of temperature regulation so performance doesn’t tank in January. Garages work well too, as long as the space isn’t already crowded with storage.
Fire codes are strict about clearances, and for good reason. Most jurisdictions require a set distance — often three feet — from doors, windows, and anything that could act as an ignition source. That rules out placing a unit right next to a gas meter or dryer vent. Placement isn’t just aesthetic; it’s a safety calculation inspectors will check line by line.
Temperature swings shorten battery life fast, so insulation quality around the chosen space counts too. A poorly insulated attic won’t affect the battery directly, but it signals the kind of envelope problems — drafts, gaps, uneven heating — that often show up throughout a house needing attic insulation upgrades alongside the battery project. Get the siting right first. Everything electrical downstream depends on it.
Electrical Infrastructure and Safety Measures
Once placement is settled, the electrical work starts, and it’s rarely as simple as plugging in a big box. Most homes need a dedicated subpanel to manage backup circuits, separating essential loads — fridge, sump pump, a few outlets — from everything else. This keeps the system from being overwhelmed during an outage and lets an installer prioritize what actually needs power.
Grounding, disconnect switches, and surge protection aren’t optional extras; they’re mandatory. A proper disconnect lets first responders or technicians shut the system down instantly, and surge protection guards against voltage spikes that could otherwise fry expensive equipment in seconds. Skip any of these, and you’re not saving money — you’re gambling with it.
Before any wiring begins, older homes with nearby gas appliances need a safety check, since electrical work in tight mechanical spaces can disturb aging connections. Scheduling professional gas leak repair beforehand, if an inspection turns up an issue, removes a serious hazard before it ever meets a live circuit. It’s a small step that prevents a much bigger problem later, and for full details or scheduling questions, the contacts page is the fastest way to reach a licensed team.
Steps in a Professional Home Battery Installation
A real installation isn’t just bolting a box to your wall. It follows a set order, and skipping steps is how people end up with systems that underperform or fail inspection. Reviewing Home Battery Installation Requirements: A Complete Guide before you sign a contract gives you a good sense of what a properly sequenced job actually looks like.
- A technician performs a full home energy assessment and load calculation, measuring your actual usage patterns so the battery is sized to real needs, not guesswork.
- The team designs the system and selects equipment based on your goals, budget, and backup priorities, whether that’s whole-home coverage or just the fridge and a few circuits.
- Paperwork gets filed for permits and utility interconnection, a step that can take longer than the physical install itself in some townships.
- Crews handle the physical mounting, wiring, and integration with your solar array or grid panel, following local electrical code to the letter.
- An inspector reviews the work, then the system goes through commissioning and live testing before anyone calls it finished.
- You get a full walkthrough of the monitoring app and maintenance basics, so you actually know what you’re looking at when the battery reports a fault.
Small details matter here too. Loose weatherstripping or gaps that undercut energy saving tips for summer won’t break your battery, but they’ll make it work harder than it should. Sequence and documentation are what separate a clean install from a headache later.
Integrating Battery Storage with Solar Panels
Retrofitting Existing Solar Systems
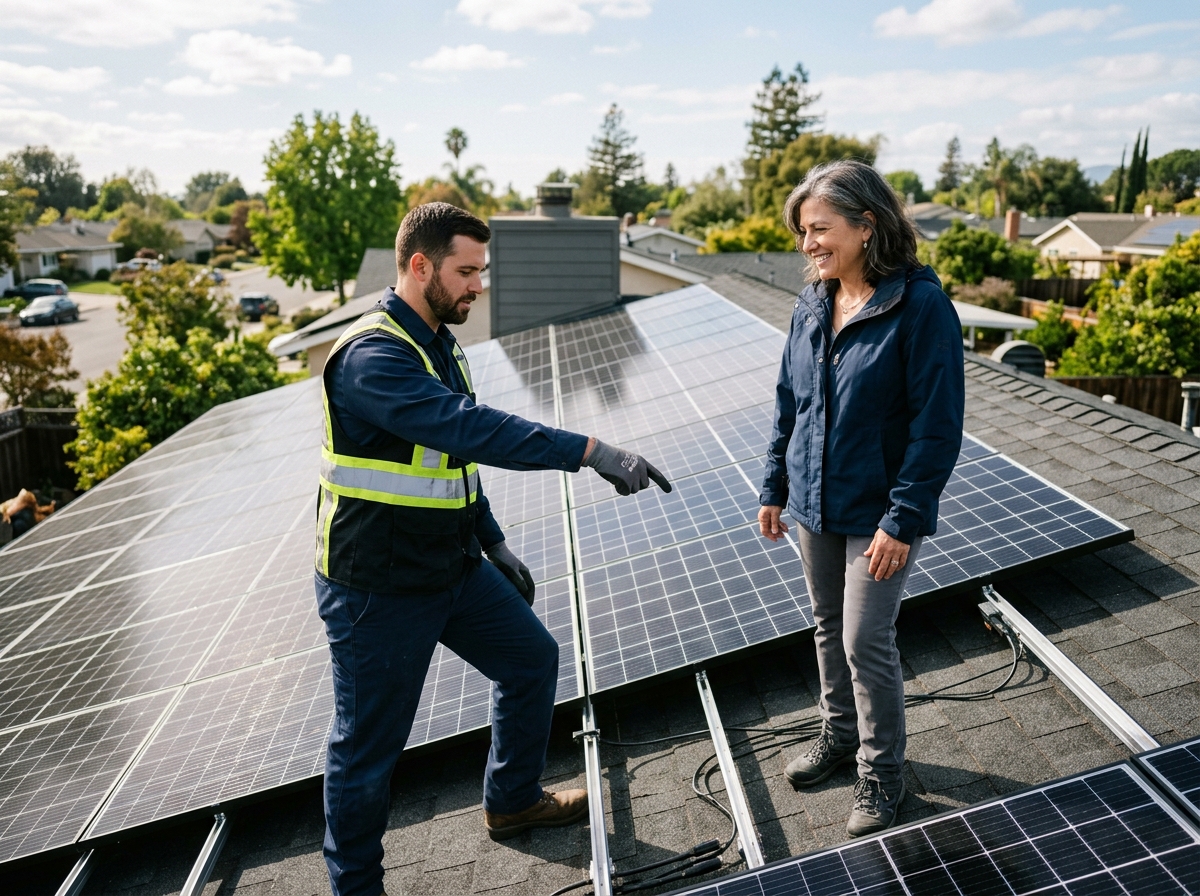
If you installed solar in the last few years, you may already have a battery-ready inverter. These hybrid inverters have built-in DC connections for batteries, which skips a whole layer of equipment and labor. Newer installs often plan for this from day one. Older ones usually didn’t, because storage wasn’t the selling point it is now.
Retrofitting an older solar array is doable, but don’t assume it’ll be simple. Many legacy systems use string inverters never designed to talk to a battery, so you’re looking at either an add-on battery inverter or a full swap. That’s real money and real time. Before committing to anything, reading a beginner’s guide to home battery storage systems can help you understand the different retrofit paths and which one fits your existing setup. It’s also a good time to have an electrician check your panel’s condition and wiring age.
Compatibility isn’t just about age, either. Panel brand, inverter, and battery manufacturer all need to play nice together, and not every combination is certified. Some manufacturers restrict warranties if you mix brands. Get this checked before you buy anything.
Maximizing Solar Self-Consumption
The whole point of pairing storage with solar is using more of the power you generate, instead of selling it back cheap and buying it back expensive. A battery banks your midday solar surplus for use at night, when your panels sit idle. Without storage, a lot of that free daytime energy just leaks back onto the grid for a fraction of its value.
Time-of-use rates make this even more worthwhile. Utilities charge more during peak evening hours, so shifting stored solar power to that window can meaningfully cut your bill. Some homeowners save more from this shifting than from the solar panels alone. That’s worth sitting with for a second.
Self-consumption gains compound when the rest of the house isn’t wasteful. Pairing storage with attic insulation, weatherstripping, and efficient appliances means less stored energy gets burned on drafts or old equipment, stretching every kilowatt-hour further.
Permits, Codes, and the True Cost of Installation
Before any battery gets bolted to a wall, your town wants paperwork. Most municipalities require permits covering electrical work, structural mounting, and fire code compliance, since a battery bank is treated a lot like a small appliance with real amperage behind it. If the system connects to the grid, you’ll also need a utility interconnection agreement, which spells out how the battery interacts with the grid during outages and normal operation. Skip this step and your utility may refuse to activate net metering at all.
Understanding Full Installation Costs
The sticker price on a battery rarely reflects what you’ll actually spend. Total cost includes equipment, labor, permit fees, and sometimes an electrical panel upgrade if your home’s service can’t handle the added load. Older homes may need structural work too, especially if wall framing wasn’t built to hold 200+ pounds. Federal tax credits and state rebate programs can offset a real chunk of that, so it’s worth checking eligibility before you sign a contract. Here’s a rough breakdown of where the money goes:
| Cost Category | Typical Range | Notes |
|---|---|---|
| Battery equipment | $8,000–$18,000 | Varies by capacity and chemistry |
| Labor and installation | $1,500–$4,000 | Depends on site complexity |
| Permits and inspection fees | $200–$800 | Set by local municipality |
| Panel upgrade (if needed) | $1,500–$3,500 | Required for older electrical services |
| Structural reinforcement | $500–$2,000 | Only if mounting wall is inadequate |
Income-eligible New Jersey households can also access free efficiency upgrades through the Comfort Partners program, which lowers baseline energy use through attic insulation, weatherstripping, and appliance replacements before a battery investment even enters the picture. That sequencing matters more than people realize.
Common Pitfalls to Avoid
Undersizing the system tops the list of regrets homeowners share. Skipping permits is another, and it’s a costly one, since uninspected systems can void insurance claims after a fire or electrical incident. Ventilation gets overlooked too often, particularly with chemistries sensitive to heat buildup. And mismatched inverters cause more service calls than almost anything else. For a broader sense of what upgrades run in your area, an insulation cost 2026 pricing guide offers useful context on how efficiency work factors into overall home energy budgets. It’s also smart to weigh placement early, since homeowners debating a battery install location often discover code restrictions dictate the choice anyway.
Getting Your Home Ready Before the Battery Arrives
Before anyone talks battery size or price, take a hard look at how your house actually uses energy. A whole-home audit measures where power gets wasted, and that number directly shapes how big, and expensive, a backup system you’ll need. Skip it, and you risk paying for capacity you didn’t have to buy.
Efficiency work done ahead of installation pays off twice: lower monthly bills now, smaller battery later. The prep work matters as much as the equipment. Consider these steps before a system ever gets sized:
- Seal obvious air leaks around doors, windows, and outlets using caulking and weatherstripping, since drafts force heating and cooling systems to work harder than necessary.
- Upgrade thin or aging attic insulation, which cuts the temperature swings that drive up seasonal energy demand.
- Swap outdated appliances for efficient replacements, and while you’re at it, a water heater insulation guide is worth reviewing to trim standby heat loss from an aging tank.
- Replace incandescent bulbs with LED lighting and install low-flow showerheads and aerators, both quick wins that lower your baseline electric and water use.
- Handle light home repair items and any gas leak repair needs, so the space is genuinely safe before new electrical equipment gets installed nearby.
Here’s the blunt truth: a battery bolted onto a leaky, inefficient house is just an expensive patch. Fix the waste first, and you’ll often qualify for a smaller, cheaper system that still covers your real needs. Many local businesses skip this step and regret it later. If you want a sense of what installed systems actually look like once a home is efficient and ready, researching options for home battery installation in other markets can offer a useful comparison point for cost and scope.
Before you invest in a home battery system, make sure the rest of your home’s energy use is working just as efficiently, and that’s where the team at Northeast Energy Conservation, Inc. (NECINJ) can help. Stop by their Pine Brook, NJ office at 16 Chapin Rd., Suite 910, for a personalized energy audit that considers your whole home, from insulation to appliances to renewable energy options. Give them a call at +1 973-244-2400 or book a visit today to start building a smarter, more efficient home.
