


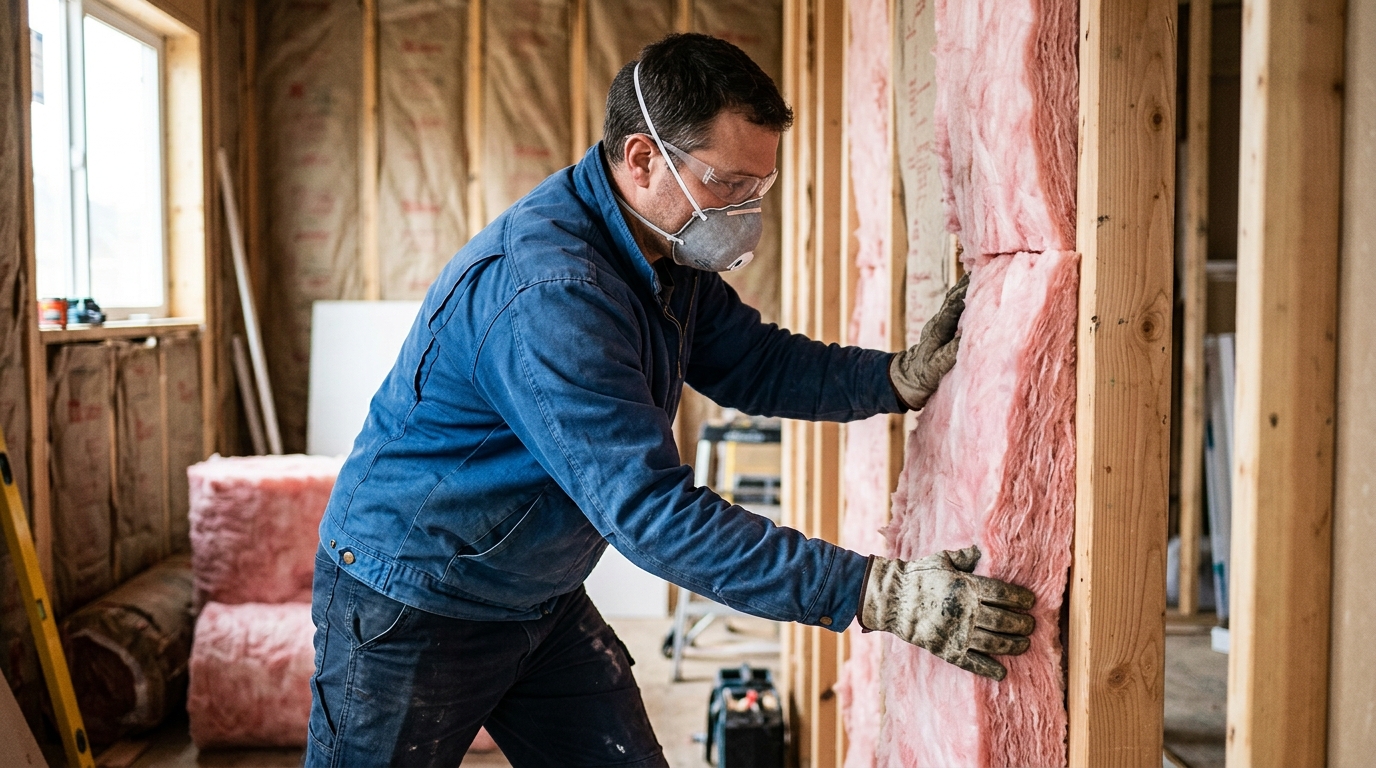
If you’re staring at insulation options for your next build or retrofit project, the sheer number of R-values and product types can turn a simple decision into a headache. R21 insulation has become a popular choice for 2×6 wall cavities. It strikes a balance between energy performance and cost that many homeowners find hard to judge without some expert guidance. This guide breaks down what R21 insulation costs, how it performs, and what installation actually involves. That way you can decide with real numbers, not vague marketing claims.
Understanding R21 Insulation and How It Works
What R-Value Actually Measures
R-value measures a material’s resistance to heat flow. It tells you how well insulation slows heat as it moves through walls, floors, and ceilings. The higher the number, the harder heat has to work to get through.
Heat always moves from warm areas to cold ones. In winter, indoor heat pushes toward the cold outdoors. In summer, it’s the reverse — outdoor heat pushes inside. Insulation acts like a barrier. It slows that transfer so your heating and cooling systems don’t work overtime.
R-value depends on thickness, density, and material type. A fiberglass batt rated R21 resists heat flow better than a thinner batt rated R13, even if both look similar on a store shelf. Thickness and fiber density make the real difference.
How R21 Compares on the R-Value Scale
Residential insulation typically ranges from about R11 for thin cavities to R60 for deep attic floors. R21 sits in the middle-to-upper range. It’s commonly used for 2×6 wall cavities in colder climates, and it outperforms standard R13 or R15 wall products.
Products like the R-21 EcoBatt Kraft Faced Fiberglass Insulation Batt High … show how manufacturers package this exact rating for standard wall depths.
Why Wall Cavities Are Rated Differently Than Attics
Walls run about 3.5 to 5.5 inches deep, so there’s only so much insulation that fits. Attics have way more open space, which allows much higher R-values — often R38 to R60. That’s why R21 is the wall standard, while attics need thicker layers to reach similar performance.
Homeowners weighing bigger upgrades, including whether are solar panels worth it for their property, should still start with solid attic insulation first. It’s cheaper, and it often pays off faster than solar additions alone.
Is R21 Insulation Right for Your Climate?
Cold-Climate Homes and Higher R-Value Needs
Homes in cold climates lose heat fast through walls and attics. The DOE recommends higher R-values here because winters demand more from insulation. In northern states, attics often need R49 to R60, while wall cavities call for R21 as a solid baseline. Colder regions simply need thicker, denser protection to keep heating bills in check.
Without enough R-value, cold air sneaks in through gaps and thin barriers. That forces furnaces to run longer, driving up costs. Pairing solid wall insulation with weatherstripping and caulking around windows seals the whole envelope — not just one piece of it.
Moderate-Climate Alternatives Like R19
Milder climates don’t always need the same insulation levels as colder ones. In these zones, R19 insulation often meets DOE guidelines for wall cavities, offering solid performance at a lower material cost. Homeowners in moderate zones may find R19 is enough for standard 2×6 walls, without giving up comfort.
Still, many homeowners pick R21 anyway for the extra efficiency, especially if they’re also planning LED light bulb replacement or other upgrades to cut overall energy use. Checking DOE zone maps helps confirm whether R19 or R21 makes more sense for your address and construction type.
How New Jersey’s Climate Zone Affects Your Choice
New Jersey falls mostly within DOE Climate Zone 4, with some southern areas bordering Zone 5. This mixed classification means winters get cold enough to justify R21 wall insulation in most homes, while attics typically need R49 or higher. Local weather swings between humid summers and freezing winters, so insulation has to perform year-round.
Following energy saving tips for summer alongside proper wall insulation keeps homes comfortable in every season. Many New Jersey homeowners pick products like R-21 Faced Fiberglass Insulation Batt 15 in. x 93 in. (1… to meet these regional demands accurately.
R21 vs Other Common Insulation R-Values
R21 vs R19: Performance and Cost Tradeoffs
R21 outperforms R19 by roughly 10% in resistance to heat flow, but it costs a bit more per square foot. R19 batts fit standard 2×6 cavities loosely, while R21 batts are built to fill that same space completely. For homeowners comparing wall insulation as part of broader projects to improve energy efficiency, the price gap is usually small next to the long-term energy savings.
R21 vs R30/R38 for Attics and Ceilings
Attics need higher R-values than walls because heat loss through ceilings is greater. R30 and R38 are common attic targets, especially through colder New Jersey winters. R21 alone won’t cut it for most attic spaces, but it works well layered with other insulation to hit code minimums.
Thickness and Space Considerations by R-Value
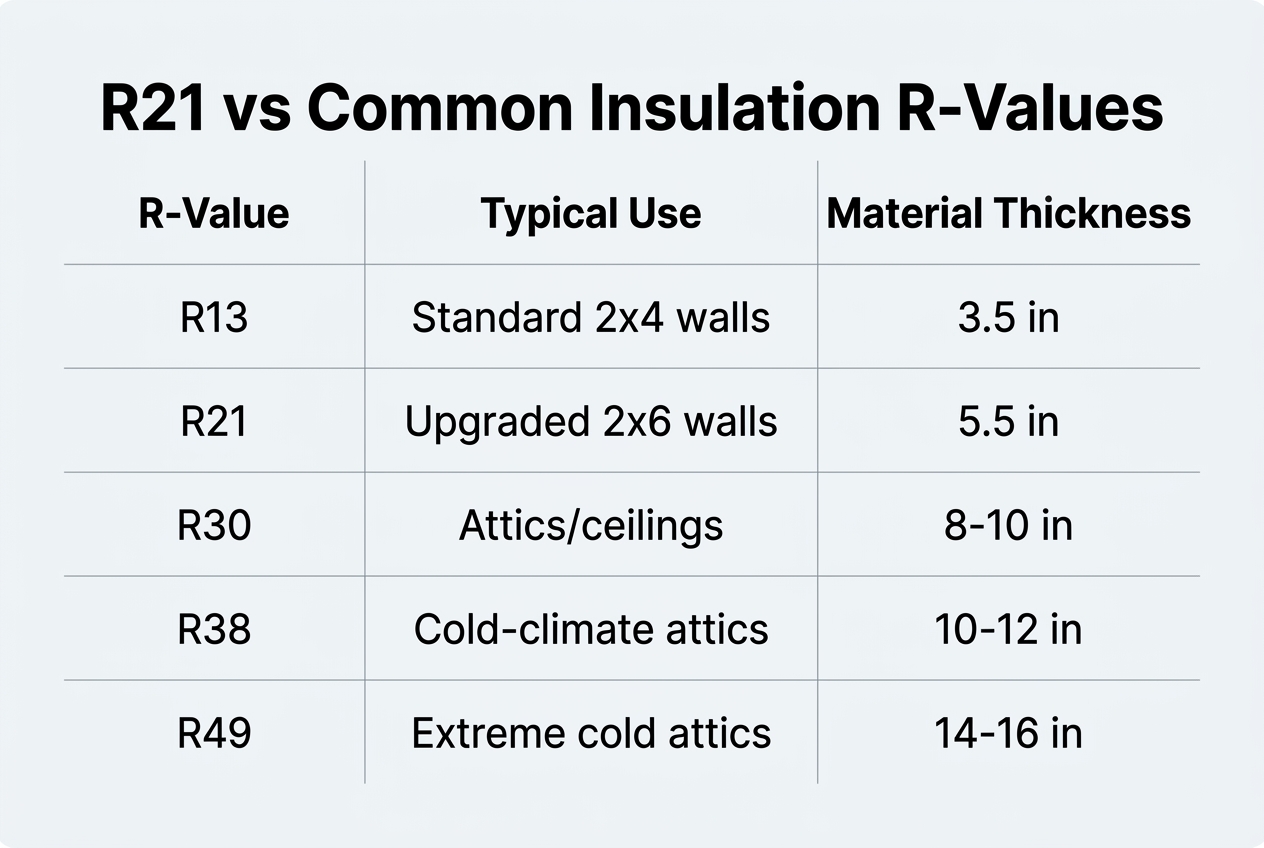
Thickness affects where each R-value fits best. The table below lays out typical specs side by side.
| R-Value | Typical Thickness | Common Use | Relative Cost |
|---|---|---|---|
| R19 | 6.25 in | 2×6 walls | Lower |
| R21 | 5.5 in | 2×6 walls, tight cavities | Moderate |
| R30 | 8–10 in | Attics, ceilings | Moderate-High |
| R38 | 12–13 in | Cold-climate attics | Higher |
A product like this 21 Wall Faced Fiberglass Batt Insulation 89.13-sq ft ( … shows how R21 batts are sized specifically for standard wall framing, not attic joists.
Types of Materials Used to Achieve R21
Fiberglass Batts and Mineral Wool Options
Fiberglass batts remain the most common way to hit R21. Standard 2×6 wall cavities fit a 5.5-inch batt rated at R21, giving consistent coverage without any special tools. Products like the R21 PINK Next Gen™ Unfaced Batts – U89B show how manufacturers engineer thickness and density together to reach that exact rating.
Mineral wool batts reach R21 at a slightly thicker profile, often near 5.25 to 6 inches depending on the brand. The denser fibers pack more resistance into each inch, which helps in tighter framing bays.
Fire safety is where mineral wool stands apart. It withstands temperatures above 1,800 degrees Fahrenheit without melting, while fiberglass softens at lower heat. It also resists moisture better and holds its shape when damp, making it a strong pick near kitchens or laundry areas.
Spray Foam Solutions for R21 Performance
Spray foam reaches R21 with less thickness than batts. Closed-cell foam rates around R6 to R7 per inch, so roughly 3 inches can deliver R21 performance. Open-cell foam runs lower, near R3.5 per inch, so it needs a thicker application to match the same value.
Closed-cell foam blocks moisture and air movement completely once cured, which makes it useful in basements or humid rooms. Open-cell foam breathes a bit more, so it suits interior walls better than damp exterior ones.
Polyiso and Rigid Board Alternatives
Polyiso board offers roughly R6 per inch, so a 3.5-inch board can get close to R21 on exterior sheathing applications. It resists moisture well and holds its rating longer than some foam boards in cold climates.
Rigid boards pair well with other upgrades, including attic insulation projects or caulking around window frames, since both cut down on air leaks that drag down overall performance.
Key Benefits of Choosing R21 Insulation
Lower Energy Bills Year-Round
Energy savings are the biggest reason homeowners upgrade. Walls that resist heat flow keep furnaces and air conditioners from working overtime. That means smaller monthly bills and fewer seasonal spikes. Comparing options gets easier with resources like R-19 vs R-21 Insulation: Which Is Right for Your Home?, which explains how small R-value jumps add up over time.
Improved Indoor Comfort and Temperature Consistency
Better insulation means fewer cold spots in winter and less heat buildup in summer. Rooms stay closer to the same temperature all day long. This matters for renters too, since steady comfort doesn’t depend on owning the home. Pairing insulation upgrades with small fixes, like weatherstripping or caulking around windows, strengthens the effect without a major renovation bill.
Sound Dampening and Moisture Control Advantages
Insulation does more than manage temperature. It also affects noise and moisture inside a home. Consider these advantages:
- Reduces outside noise from traffic, neighbors, or weather, creating a quieter living space.
- Limits sound transfer between rooms, which helps in shared or multi-family housing.
- Controls condensation buildup that can lead to mold or wood rot over time.
- Protects wall cavities from moisture damage that shortens a home’s lifespan.
- Supports long-term cost reduction by preventing repairs tied to water intrusion.
Exploring our services can help homeowners see how insulation fits into a broader energy-efficiency plan, alongside upgrades like attic insulation or appliance replacements.
Where R21 Insulation Makes the Most Sense in Your Home
Exterior Wall Cavities and Framing Considerations
R21 batts are built for 2×6 exterior walls, where the deeper cavity gives the material room to fully expand. A standard product like R21 Faced Fiberglass Insulation (5.5″ x 23″ x 93″ batts) is sized precisely for this framing depth, which helps installers avoid the compression that hurts performance.
Homes built with 2×4 walls usually can’t fit R21 without squeezing the batt, which lowers its effective R-value. In those cases, a lower-density product often performs better than forcing R21 into a shallow cavity.
Pairing wall insulation with caulking and weatherstripping around windows and doors closes air gaps that batts alone can’t seal, giving you a more complete thermal boundary.
Basements, Crawlspaces, and Rim Joists
Basement walls, crawlspace perimeters, and rim joists are common spots where R21 fits well. These areas often share similar framing depths with exterior walls, making the batt a natural match for cutting heat loss near the foundation.
Rim joists benefit especially, since this narrow band is a major source of drafts and moisture. Combining insulation here with attic upgrades elsewhere creates a more balanced, efficient envelope throughout the home.
New Construction vs Retrofit Applications
New construction gives open access to studs, making R21 installation straightforward and consistent. Retrofit projects are trickier, since existing drywall, wiring, and plumbing limit how insulation can be placed.
In retrofits, a professional often pairs insulation upgrades with light home repair work to fix damaged framing first. Attics frequently need higher R-values than R21, especially in colder climates, so don’t assume one R-value fits every part of the house. Before scheduling any assessment, homeowners should review a provider’s privacy policy to understand how their information and home data are handled.
Installation Considerations and Common Mistakes
Air Sealing Before Adding Insulation
Insulation slows heat flow, but it doesn’t stop air leaks. Before installing batts or rolls, seal cracks, gaps, and penetrations around wiring, plumbing, and framing. Caulking and Weatherstripping around windows, doors, and outlets close the small gaps that let conditioned air escape. Skip this step, and insulation works twice as hard for half the benefit.
Avoiding Gaps, Compression, and Moisture Traps
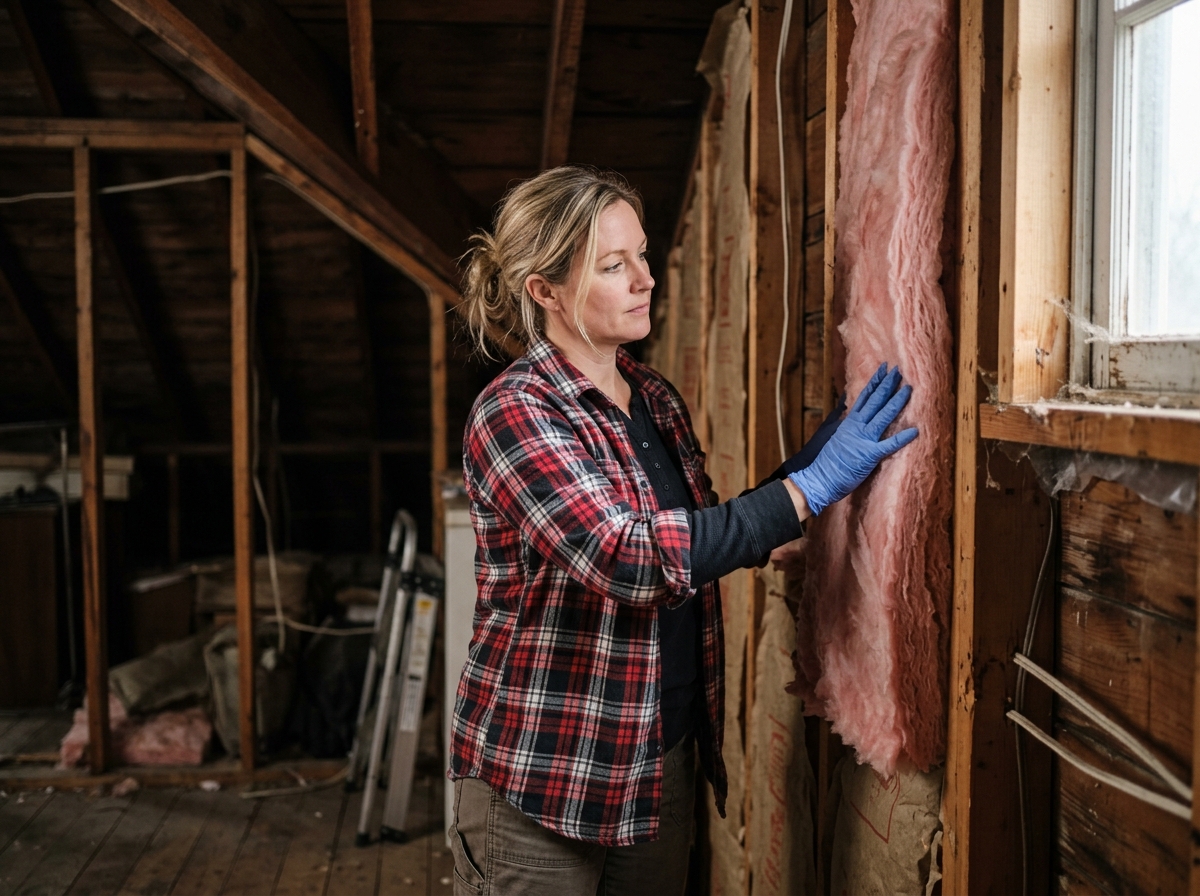
Proper fit matters as much as material choice. Compressed insulation loses R-value, while gaps create cold spots and condensation risk.
- Cutting batts too short around outlets, pipes, or corner studs leaves uninsulated pockets that leak heat.
- Stuffing insulation too tightly into a cavity compresses the fibers and reduces its rated performance.
- Installing a vapor barrier on the wrong side of the wall can trap moisture inside the cavity.
- Covering recessed lighting or vents without proper clearance creates fire hazards and reduced airflow.
- Leaving attic insulation piled against soffit vents blocks ventilation and encourages mold growth.
Why Professional Installation Improves Performance
A trained installer measures cavities precisely, seals air leaks first, and checks for moisture issues before closing walls. Many local businesses pair this work with related upgrades, such as Attic Insulation or minor repairs, to get the most out of whole-home efficiency. For questions about scheduling an assessment, reach out through contacts. Homeowners who’d rather source materials themselves can also Buy R21 Insulation Online before hiring an installer.
Steps to Evaluate and Upgrade Your Home’s Insulation
Step 1: Scheduling a Comprehensive Energy Audit
Every insulation project should start with a professional energy audit. A trained technician inspects your attic, walls, and basement, using tools like blower doors and infrared cameras to find hidden problems. This diagnostic first step keeps you from wasting money on the wrong fixes.
Step 2: Identifying Insulation Gaps and Air Leaks
The audit reveals where heat escapes and cold air sneaks in. Common trouble spots include attic hatches, rim joists, and old window frames. You can read more troubleshooting tips on this blog. Below is a sample summary many homeowners receive after an audit.
| Area Inspected | Common Finding | Recommended Fix |
|---|---|---|
| Attic | Insufficient depth, gaps around vents | Attic Insulation top-up |
| Wall cavities | Compressed or missing batts | Blown-in fill or R21 batts |
| Doors/windows | Visible drafts, worn seals | Weatherstripping |
| Foundation gaps | Cracks near sill plate | Caulking |
Step 3: Prioritizing Upgrades for Maximum Savings
Not every fix delivers equal value. Sealing air leaks often costs less than $500 but can cut energy loss by 10 to 15 percent. Attic upgrades typically pay back the fastest. Bigger jobs, like full wall insulation, come next once the quick wins are done.
Cost, Rebates, and Return on Investment
Typical Installation Costs and Price Factors
Prices for an R21 upgrade depend on wall size, material choice, and whether walls are open or already closed. Labor, access difficulty, and local rates shift the final bill too. Batts cost less than spray foam, but foam often seals gaps better.
| Project Type | Material | Cost per Sq Ft | Typical Total (1,500 sq ft) |
|---|---|---|---|
| New construction wall | Fiberglass batt | $0.75–$1.20 | $1,125–$1,800 |
| New construction wall | Closed-cell spray foam | $1.75–$2.50 | $2,625–$3,750 |
| Retrofit (blown-in) | Cellulose or fiberglass | $1.50–$2.25 | $2,250–$3,375 |
| Basement rim joist | Rigid foam board | $2.00–$3.00 | $1,200–$1,800 (partial area) |
Calculating Long-Term Energy Savings
Payback depends on climate, current insulation, and energy prices. Many households recoup costs in five to ten years through lower heating and cooling bills. Pairing insulation with weatherstripping and caulking speeds things up by stopping additional air leaks.
Rebates, Incentives, and Free Programs for Eligible Households
Utility rebates, state energy programs, and federal tax credits can cut upfront costs significantly. Income-eligible households sometimes qualify for no-cost insulation and weatherization services. Reviewing a completed portfolio of past projects helps homeowners gauge realistic pricing before requesting quotes. Many local businesses also bundle insulation with LED bulb swaps or aerator replacements to boost total savings.
Frequently Asked Questions About R21 Insulation
How Thick Is R21 Insulation?
Standard fiberglass batts rated at R21 measure about 6.25 inches thick. That thickness is built to fill a full 2×6 wall cavity without gaps. Thinner products, like high-density batts, can hit R21 at closer to 5.5 inches, which matters if wall space is tight.
Spray foam reaches R21 at a different thickness, often around 4 to 4.5 inches for closed-cell foam. This is why thickness alone doesn’t tell the whole story. Density and material type change how much space is needed to hit the same performance number.
Before buying material, measure your existing wall cavity depth. A quick check with a tape measure keeps you from ordering the wrong batt size or overcompressing insulation, which quietly lowers its real-world R-value.
Does R21 Fit Standard 2×6 Walls?
Yes. R21 is the go-to rating for 2×6 framed walls, which are standard in most homes built after the 1990s. The batt fills the cavity edge to edge without stuffing or gapping, both of which hurt performance.
Older homes with 2×4 walls usually can’t fit standard R21 batts. In those cases, contractors often use higher-density R21 products or switch to spray foam to hit similar performance in a shallower space.
If you’re unsure what framing your home has, a quick inspection during an energy audit clears this up fast, before any material gets ordered or installed.
How Long Does R21 Insulation Last?
Fiberglass and mineral wool R21 insulation typically lasts 80 to 100 years when kept dry and undisturbed. Spray foam holds similar longevity, often outlasting the home’s original roof or siding.
Performance can drop sooner if insulation gets wet, compressed, or damaged by pests. Moisture from a hidden gas leak, roof leak, or poor ventilation is a common culprit, so pairing insulation upgrades with basic maintenance like caulking and weatherstripping protects your investment.
For New Jersey’s mixed climate, R21 in walls generally holds up well for decades, especially alongside proper attic insulation. Homeowners weighing options can browse a gallery of completed projects to see how these materials perform in real homes over time.
Before committing to new ductwork or a sealing contract, it’s worth asking how much of your comfort problem actually lives in the ducts versus the shell of the house — a drafty attic hatch, a gap under a door, or thin attic insulation can undo a perfectly sealed duct run. Getting clear answers means knowing what a diagnostic test can and can’t tell you, what the proposed work will cost against the leakage it’s likely to eliminate, and whether simpler envelope measures like caulking, weatherstripping, and added attic insulation would get you most of the way there first. Those two paths aren’t in competition so much as sequenced, and understanding which one your home needs more is the question worth sitting with.
