


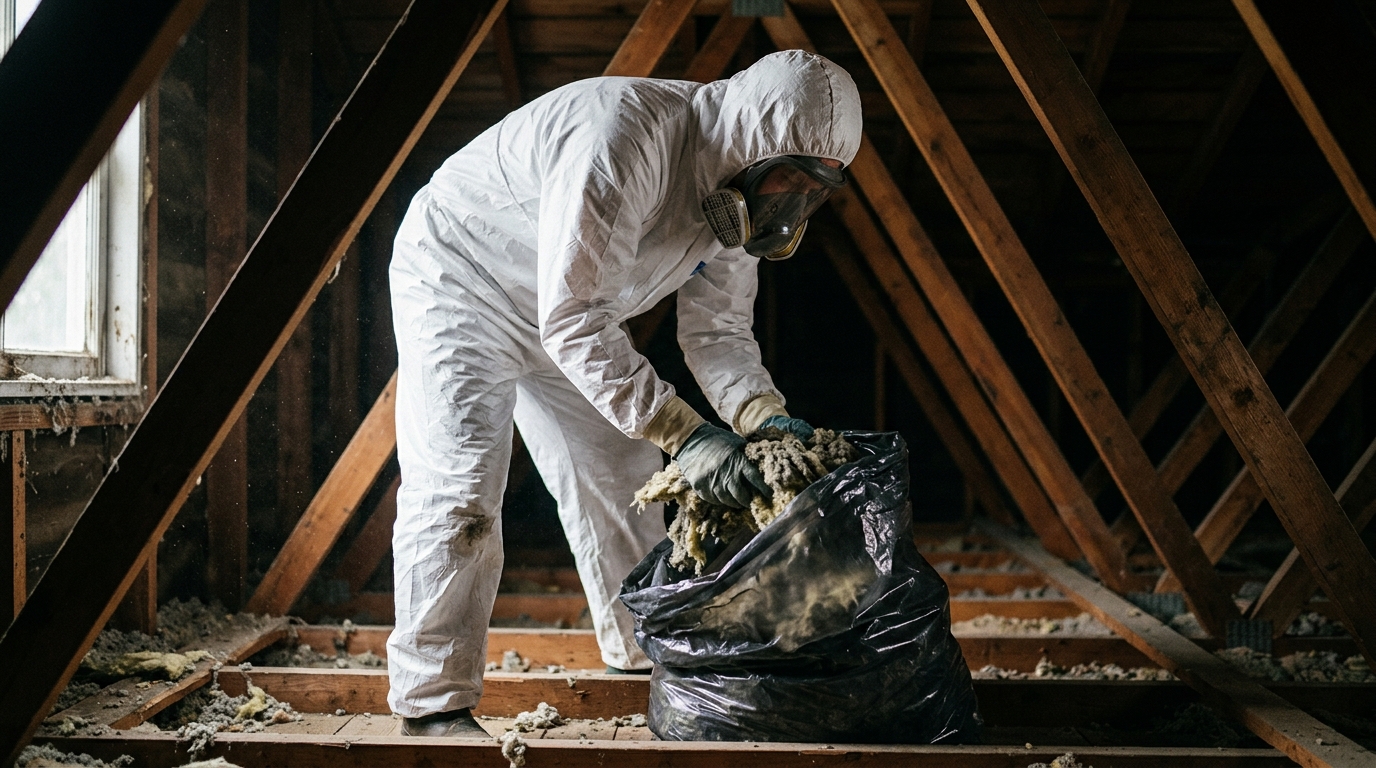
Old, contaminated, or waterlogged insulation doesn’t just sit quietly in your attic. It drives up energy bills, harbors mold and pests, and undermines the comfort of your entire home. Before you can properly insulate, you need to deal with what’s already there. That’s where professional insulation removal becomes essential to getting it right. This guide walks New Jersey homeowners through every stage of the process for 2026, from spotting the warning signs to choosing a qualified contractor, so you can make informed decisions and reclaim a healthier, more energy-efficient living space.
Why Insulation Removal Matters for Home Energy Efficiency
Signs Your Insulation Has Failed
Old insulation rarely fails quietly. Look for flattened or compressed batts in the attic, dark staining from moisture, or a musty smell near exterior walls. These are signs that your insulation has stopped doing its job. Rodent droppings or shredded nesting material are also common red flags in older homes.
Uneven temperatures between rooms, drafts near outlets, and rising heating bills often point to the same problem. Cold floors above unheated crawlspaces are another clue. Many homeowners searching online forums, including threads like “Anyone have experience removing attic insulation?”, find they’re not alone in facing this issue.
How Degraded Insulation Raises Energy Bills
Insulation loses R-value as it ages, settles, or gets wet. Fiberglass batts can lose 20 percent or more of their effectiveness after a couple of decades. Loose-fill cellulose settles over time, leaving gaps that let conditioned air escape. This forces furnaces and air conditioners to work harder, running longer cycles to reach the same comfort level.
The result shows up directly on utility bills. A home with degraded insulation can see heating and cooling costs climb by 20 to 30 percent compared to a properly insulated one. Small daily losses add up fast across a full year.
The Link Between Insulation and Overall Home Performance
Insulation doesn’t work alone. It interacts with air sealing, ventilation, and even appliance efficiency to shape total home performance. That’s why many projects to improve energy efficiency start with an inspection of existing insulation before adding weatherstripping, caulking, or attic upgrades. The rest of this guide walks through removal, replacement, and next steps.
Common Reasons Homeowners Remove Old Insulation
Rodent and Pest Contamination
Mice, squirrels, and insects love old insulation. It gives them warm nesting material and easy access to hidden spaces. Once pests move in, contamination spreads fast through droppings, urine, and shredded fibers. This creates health risks and foul odors that linger long after the animals leave.
Homeowners often notice the problem during routine maintenance, like checking on light home repair projects or inspecting attic wiring. A quick look often reveals much bigger damage underneath.
Mold, Moisture, and Water Damage
Water is insulation’s worst enemy. Roof leaks, plumbing failures, and poor ventilation all trap moisture inside insulation layers. Over time, this leads to mold growth that spreads into wood framing and drywall. Wet insulation also loses its ability to block heat, driving up energy bills.
Common triggers include the following situations homeowners frequently encounter:
- A slow roof leak that soaked attic insulation for months before anyone noticed the stains.
- Condensation from poor bathroom ventilation, often solved alongside a showerhead and aerator replacement.
- Old vermiculite insulation, which may contain asbestos and requires careful, specialized removal.
- Basement flooding that saturated wall insulation and left behind a musty smell.
- Ice dams that pushed melting snow beneath shingles and into the insulation layer.
Renovation and Upgrade Projects
Renovations often expose insulation nobody has seen in decades. Contractors opening walls for rewiring, appliance replacements, or gas leak repair frequently find crumbling, outdated material. This is a natural moment to remove it and upgrade to modern, energy-efficient products.
Many homeowners pair this work with small efficiency upgrades, like caulking, weatherstripping, or reviewing energy saving tips for summer before closing walls back up. For larger jobs, crews sometimes rent an Insulation Removal Vacuum to speed cleanup and cut down on dust throughout the house.
Insulation Types and Removal Difficulty Compared
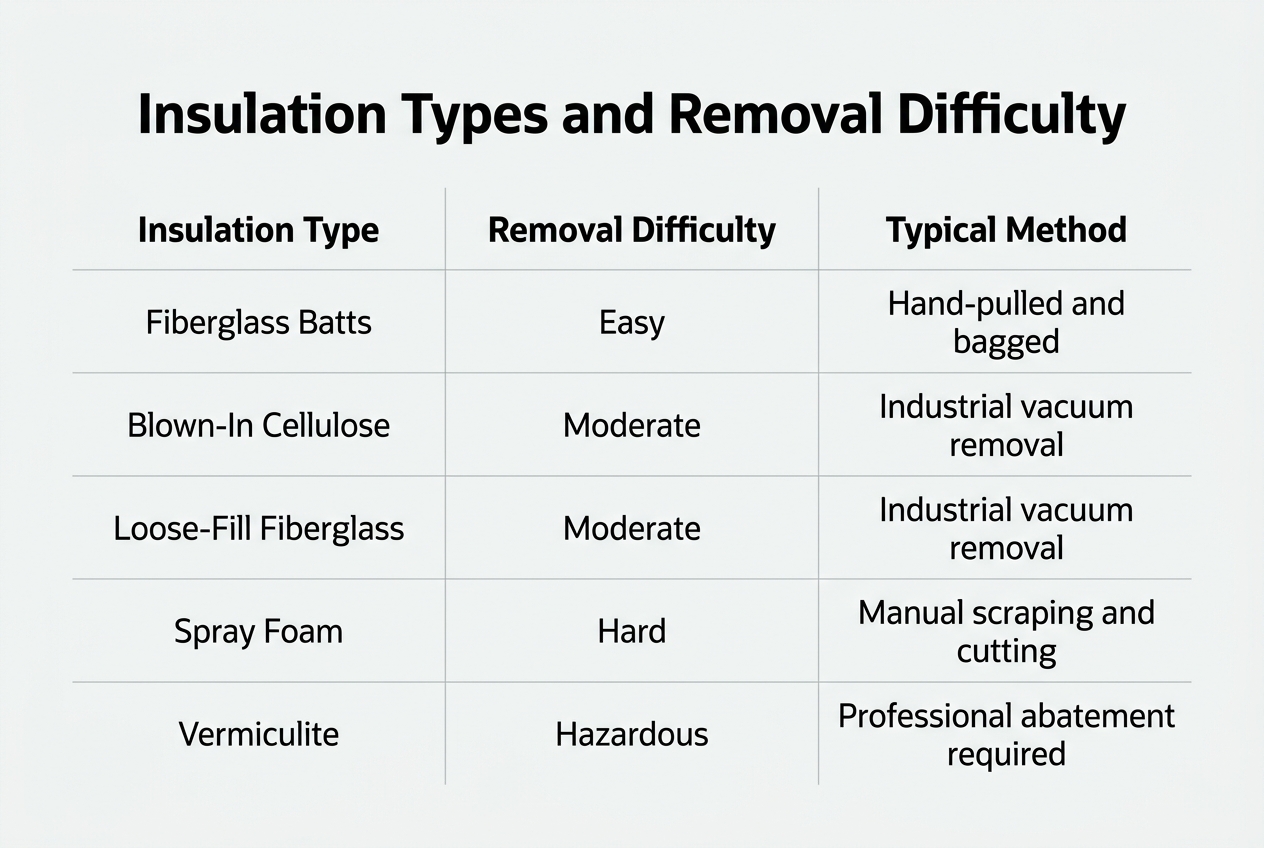
Not all attic materials come out the same way. Insulation type drives cost, time, and risk. Some jobs take an afternoon. Others need special gear and testing before anyone touches the material. The table below compares the four most common types homeowners face.
| Insulation Type | Removal Difficulty | Typical Cost Factor | Main Hazard |
|---|---|---|---|
| Blown-In / Loose-Fill | Moderate | Low to medium | Dust, allergens |
| Batt and Roll | Easy to moderate | Low | Fiberglass irritation |
| Spray Foam | Very hard | High | Chemical fumes |
| Vermiculite | Hard, specialized | High | Possible asbestos |
Blown-In and Loose-Fill Insulation
Blown-in cellulose or fiberglass gets vacuumed out with commercial equipment. It’s messy but manageable for many homeowners. This video, How To Remove Blown-in Attic Insulation | My First Renova…, shows the basic process step by step.
Batt and Roll Insulation
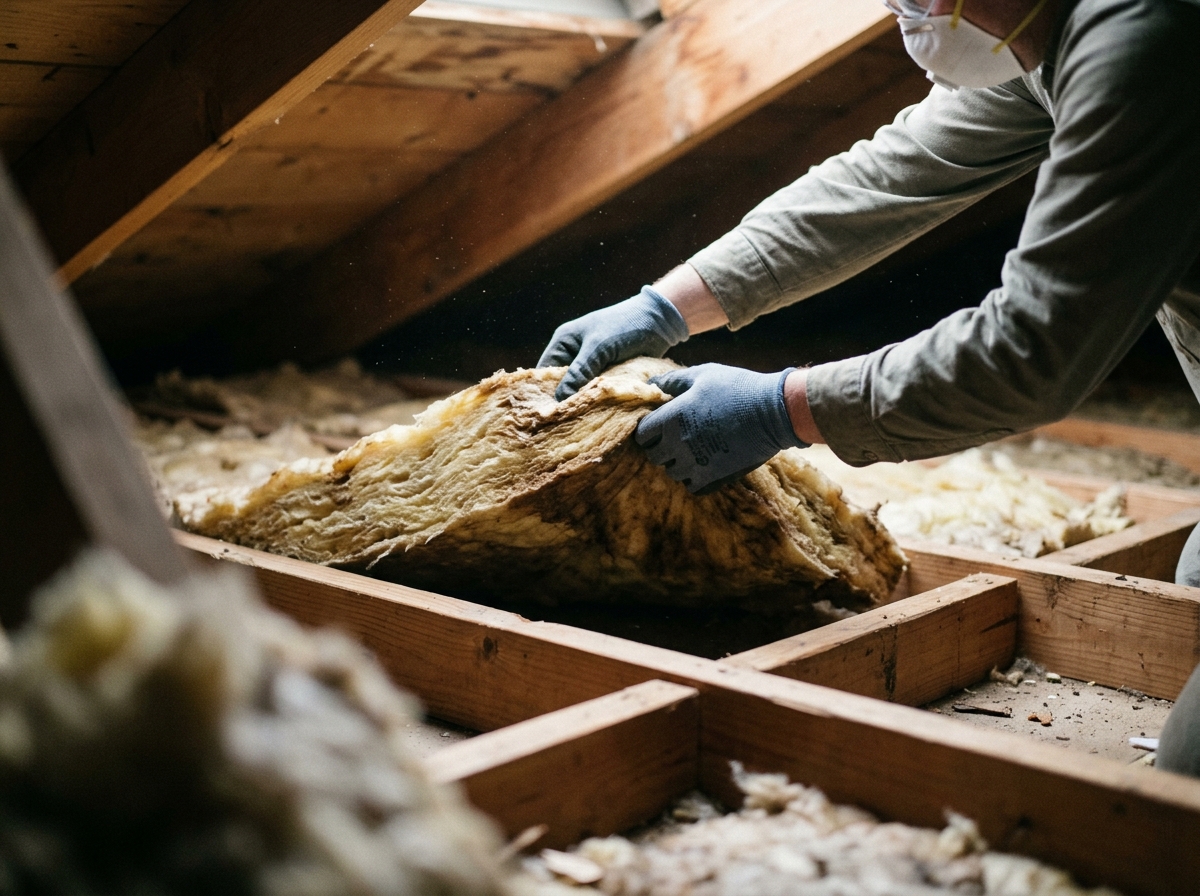
Batts are the easiest type to remove. They peel up in sections and bag quickly. Fiberglass still irritates skin and lungs, so gloves and a mask matter.
Spray Foam and Vermiculite Challenges
Spray foam bonds tightly to wood, so it needs scraping or cutting. Vermiculite may contain asbestos, which means testing first. Learn more about the standards behind this work on our about us page.
Safety Precautions Before You Begin
Personal Protective Equipment Essentials
Old insulation traps dust, fibers, and rodent debris. Before touching anything, gear up properly. Protective equipment is not optional in a tight attic space.
- Wear a NIOSH-rated N95 or P100 respirator to block fine fiberglass and cellulose particles from your lungs.
- Cover exposed skin with long sleeves, gloves, and sealed goggles to prevent itching and eye irritation.
- Choose a disposable coverall suit so contaminated clothing doesn’t spread dust through the rest of the house.
- Use knee pads or a foam mat, since attic joists are hard and unforgiving during long removal sessions.
- Keep a headlamp on hand for hands-free lighting in dark, cramped corners.
Identifying Asbestos or Vermiculite Risks
Homes built before 1990 may contain vermiculite insulation laced with asbestos. This material looks like small, shiny pebbles. Never disturb it without testing first. A certified lab can confirm whether fibers are present. If asbestos shows up, stop work immediately and call a licensed abatement specialist. Disturbing contaminated material releases fibers that cause serious long-term lung disease. This detailed guide on Attic Insulation Removal: How to Remove Old … outlines warning signs worth reviewing beforehand.
Ventilation and Attic Access Safety
Attics often hide electrical wiring, loose flooring, and poor airflow. Turn off power to any attic lighting or exposed wiring before starting. Test flooring stability before placing full weight on joists. Open attic vents or run a fan to clear dust and improve air circulation. If you’re weighing bigger upgrades afterward, consider whether are solar panels worth it for your household energy goals.
Tools and Equipment Needed for the Job
Renting an Insulation Vacuum
A powerful insulation vacuum is the core tool for pulling loose-fill or damaged batts out of an attic quickly. Most rental centers offer gas or electric models with long hoses that reach tight corners. For a detailed walkthrough of the process, see How to Remove Old Attic Insulation: A Step-by-Step Guide.
Choosing the Right Removal Bags
Bags must handle heavy, dusty material without tearing mid-carry. Containment supplies matter as much as the vacuum itself. A weak bag creates a bigger mess than the job you started with.
| Item | Typical Cost | Best For |
|---|---|---|
| Gas-powered vacuum rental | $150–$250/day | Large attics, heavy debris |
| Electric vacuum rental | $80–$140/day | Smaller jobs, indoor use |
| Heavy-duty removal bags (25/box) | $40–$70 | Loose-fill and blown insulation |
| Poly sheeting (per roll) | $25–$45 | Floor and doorway containment |
Additional Hand Tools and Supplies
Keep a utility knife, staple remover, flashlight, and duct tape on hand for batt removal. Renting covers occasional jobs, while frequent renovators may find buying cheaper long term. Many local businesses bundle these tools with our services during larger energy upgrades.
Step-by-Step Process for Removing Old Insulation
Assessing Project Size and Scope
Start by measuring the attic or wall area in square feet. This number drives your time estimate, bag count, and disposal cost. A small 600-square-foot attic might take a weekend. A 1,500-square-foot attic with wet or compacted material could take three days. Some homeowners research DIY attic insulation removal forums before deciding whether to tackle it themselves.
The table below breaks down typical project sizes to help you plan time, labor, and bag needs.
| Attic Size | Estimated Time | Workers Needed | Bags Required |
|---|---|---|---|
| Under 600 sq ft | 4-6 hours | 1-2 | 15-20 |
| 600-1,000 sq ft | 1 full day | 2 | 25-35 |
| 1,000-1,500 sq ft | 1.5-2 days | 2-3 | 40-55 |
| Over 1,500 sq ft | 2-3 days | 3-4 | 60+ |
Preparing and Sealing the Work Area
Cover attic hatches, vents, and doorways with plastic sheeting before work begins. Seal gaps with tape to stop dust from spreading into living spaces. This is a good time to schedule related fixes, like caulking or weatherstripping, since walls and trim are already exposed.
Vacuuming, Bagging, and Removal Technique
Work in small sections. Vacuum loose-fill material into a collection bag, then seal and label each one. Methodical bagging prevents tears and keeps debris contained. Review a provider’s privacy policy before scheduling any in-home assessment.
Proper Disposal and Cleanup Afterward
Following Local Disposal Regulations
Many townships treat old insulation as construction debris, not regular trash. Some require special permits for bagged fiberglass or cellulose. Others limit how many bags curbside pickup will accept each week. Check with your municipal waste office before you haul anything to the curb.
Vermiculite insulation deserves extra caution. It may contain asbestos, so many local businesses recommend hazardous waste drop-off sites instead of standard trash routes. Calling ahead saves a wasted trip and keeps your disposal fully compliant.
Cleaning and Decontaminating the Attic Space
Bag all debris in heavy-duty contractor bags, sealing each one tightly before it leaves the attic. This prevents fibers from drifting through hallways and living spaces during the haul-out.
After removal, vacuum every joist, rafter, and corner with a HEPA-filtered shop vac. This step catches leftover dust that ordinary sweeping misses. For a detailed walkthrough, this guide on How to remove old attic insulation and what to replace … covers decontamination in practical detail.
Wipe down surfaces with a damp cloth, then check for rodent droppings or mold spots. Address these issues now, before new material goes in.
Preparing the Attic for New Insulation
Inspect exposed wiring, ductwork, and vents. This is an ideal moment to schedule small fixes like Light Home Repair or minor Gas Leak Repair while everything is visible.
Seal gaps with Caulking and Weatherstripping around penetrations before installing fresh Attic Insulation. If you need guidance choosing a provider, reach out through contacts for a straightforward, no-pressure conversation.
DIY vs Hiring a Professional Insulation Contractor
Cost and Time Trade-Offs
Renting a vacuum extraction machine costs between $75 and $200 per day, plus bags and a truck to haul debris. A weekend DIY project might run $300 to $500 in equipment alone. Hiring a crew for a standard attic typically costs $1,000 to $3,000, depending on square footage and material type, but the job finishes in hours instead of days.
Time matters too. A homeowner working alone may spend two full days on a job a trained crew completes in four to six hours. Labor efficiency often offsets the higher upfront price, especially when you factor in lost weekends and sore muscles.
Many local businesses offer free estimates, making it easy to compare the true cost against a DIY budget before committing to either path.
When Hazardous Materials Require a Pro
Vermiculite insulation installed before 1990 often contains asbestos fibers. Disturbing it without proper containment can release particles into living spaces. Rodent-contaminated batts carry bacteria and droppings that require respirators rated above a basic dust mask. These situations demand licensed professionals, not weekend ambition.
Knob-and-tube wiring hidden under old insulation poses fire risk if handled carelessly. Mold growth on soaked material can trigger respiratory issues if disturbed without containment sheeting. Any suspected asbestos or mold should stop DIY work immediately and prompt a call for testing.
Benefits of Professional Assessment and Rebates
A trained assessor identifies moisture sources, pest entry points, and ventilation gaps a homeowner might miss. This assessment often reveals related repairs, like caulking gaps or weatherstripping needs, that improve results before new attic insulation goes in.
Professional documentation also supports rebate applications through state energy programs. Many utilities require proof of proper removal and disposal before approving incentives. Reading a program’s blog can help homeowners understand qualification steps and paperwork requirements ahead of scheduling work.
What Comes Next: Choosing New Insulation and Saving Energy
The Role of a Home Energy Audit
Before buying new material, schedule a home energy audit. An auditor checks attic depth, wall cavities, and airflow patterns using tools like blower doors and infrared cameras. This data shows exactly where heat escapes.
The audit results guide your insulation choice. A home losing heat through the attic needs different R-values than one with drafty walls. Auditors often flag related issues too, like poor caulking or missing weatherstripping around doors.
Many local businesses combine audits with small repairs. You might learn that a gas leak repair or light home repair is needed before insulation goes in. Fixing these first protects your investment and keeps your family safe.
Exploring Assistance Programs for Eligible Households
New insulation can be costly, but assistance programs ease that burden. Income-eligible households often qualify for free or reduced-cost attic insulation and weatherization services. These programs also cover LED light bulb replacement and showerhead and aerator replacement.
Rebates through utility companies and state programs can offset labor and material costs significantly. Some homeowners save hundreds of dollars simply by asking about eligibility before starting a project.
Reviewing a completed portfolio of past insulation projects helps set realistic expectations for your own home’s transformation.
Maximizing Long-Term Energy Savings
Fresh insulation delivers long-term energy savings when paired with smart upgrades. Sealing gaps, replacing old appliances, and upgrading fixtures all reduce monthly bills over time.
Consistent temperatures mean less strain on furnaces and air conditioners. Many homeowners notice lower utility bills within the first season after installation.
Small steps, like home appliance replacements, add up alongside insulation upgrades. Together, these changes create a noticeably more efficient, comfortable home for years ahead.
Frequently Asked Questions About Removing Old Insulation
How Much Does Removal Typically Cost
Cost depends on attic size, insulation type, and contamination level. A small attic with clean fiberglass batts costs less than a large space packed with rodent-infested cellulose. Many homeowners also bundle small fixes, like caulking or weatherstripping, into the same visit to save on labor. You can browse a gallery of completed attic projects to see what different jobs typically involve.
- Basic vacuum removal of loose-fill insulation often runs on the lower end of the price range.
- Contaminated insulation requiring hazmat handling adds significant cost due to safety gear and disposal fees.
- Larger attics naturally increase labor hours and total project price.
- Difficult access points, like cramped crawlspaces, raise costs because work moves slower.
- Additional repairs, such as sealing gaps or replacing damaged wood, add to the final bill.
How Long Does the Process Take
Most residential jobs finish within one day. A single-story attic with moderate insulation typically takes four to six hours. Larger homes, or those needing extensive cleanup, may stretch into a second day. Timing also depends on whether crews find hidden problems, like moisture damage or old wiring needing light home repair.
Can You Reuse or Recycle Old Insulation
Reuse is rarely recommended. Old insulation often holds moisture, pests, or degraded fibers that reduce performance. Recycling is possible for some fiberglass batts if they remain dry and uncontaminated. Cellulose insulation, however, usually gets discarded once removed. Most homeowners choose fresh attic insulation afterward for better efficiency and safety.
Before you commit to a duct cleaning or sealing contractor, it’s worth asking what problem you’re actually trying to solve — because if the discomfort traces back to a drafty attic hatch, gaps around window trim, or thin insulation overhead, sealed ducts won’t fully fix it. A good starting question is how much of your conditioned air is escaping through the building envelope versus the duct system, since the answer shapes where your money does the most good; an energy audit, along with straightforward work like caulking, weatherstripping, and adding attic insulation, addresses that same loss from the shell side. Take the time to understand which path fits your home’s real weak points, and you’ll spend far less chasing symptoms.
