


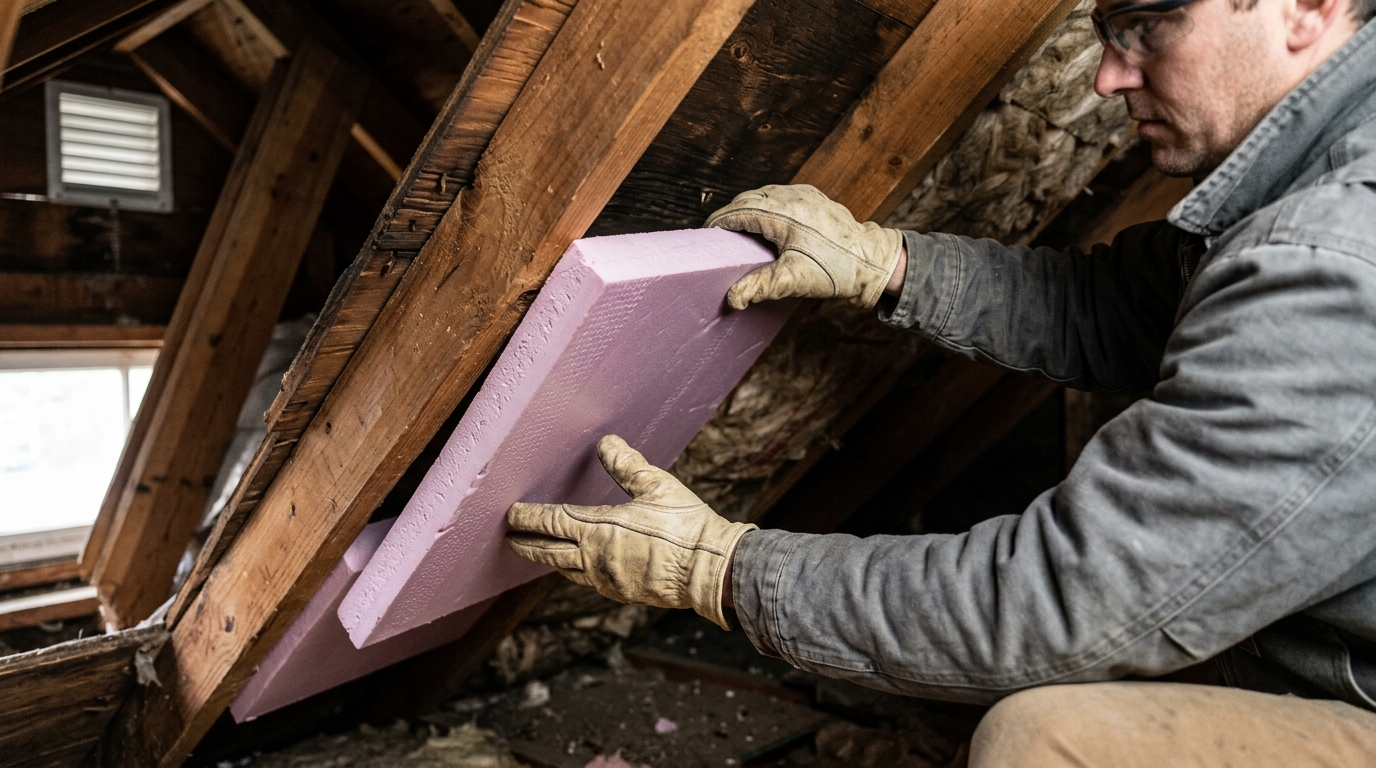
Ice dams along the eaves, musty smells in the attic, and energy bills that keep climbing even after fresh insulation—these usually trace back to one overlooked culprit: blocked soffit vents starving your attic of airflow. Homeowners often pile insulation right up against the roofline. They don’t realize this cuts off ventilation and invites moisture damage, mold, and premature shingle failure. Properly installed attic baffles insulation work together to keep a clear air channel running from soffit to ridge, protecting your roof deck while keeping energy performance intact. NECINJ breaks down how baffles function, which materials hold up best, and how to install them correctly so your attic stays dry, efficient, and code-compliant for years to come.
Understanding Attic Baffles Insulation and Why It Matters
What Baffles Actually Do
Baffles are simple channels installed at the roof’s edge, right above the soffit vents. Their job: hold a clear air path open between the insulation and the roof deck. Without them, loose-fill or batt insulation shifts and can block the soffit vents completely, cutting off fresh air before it reaches the attic space.
Most baffles are made from rigid foam, cardboard, or plastic, and they attach directly to the roof rafters. Homeowners often find them labeled as Baffles and Vent Chutes at building supply stores. Each one creates a small, protected tunnel that lets outdoor air flow upward, keeping the ventilation system working as designed.
How Airflow Impacts Home Comfort
Good attic airflow keeps temperatures balanced year-round. In summer, moving air pushes hot, trapped heat out through the ridge vent, easing strain on your air conditioner. In winter, steady airflow prevents moisture buildup. That lowers the risk of mold, wood rot, and ice dams along the eaves.
Poor airflow forces heating and cooling systems to work harder, driving up utility bills. This is one reason ventilation comes up alongside broader projects to improve energy efficiency. A well-vented attic supports insulation performance throughout the whole house, not just overhead.
Common Misconceptions About Attic Venting
Many homeowners assume more insulation always means better performance. Not true. Insulation piled against the roof deck without baffles can smother airflow entirely, causing the exact problems it was meant to prevent.
Others believe attic vents work fine simply because they exist. During a proper energy audit, technicians check whether baffles are present, correctly placed, and unobstructed. This step matters as much as measuring insulation depth, since blocked vents quietly undo the benefits of an otherwise well-insulated attic.
How Roof Ventilation Systems Work
Intake Vents Explained
Intake vents sit low on the roofline, usually along the soffits under the eaves. Their job is simple: pull cool, fresh air into the attic space. This air enters at the lowest point of the attic and starts moving upward as it warms. Without a clear entry point, the whole ventilation system stalls before it begins.
Soffit vents come in strips or individual circular vents, often paired with baffles to keep the airflow path open. Blocked soffits are one of the most common problems homeowners face, frequently caused by insulation stuffed too tightly into the eaves. Even a small obstruction can cut airflow dramatically, undermining the entire intake system.
Exhaust Vents Explained
Exhaust vents sit at or near the roof’s peak, commonly known as ridge vents. Their role: let warm, moist air escape once it rises through the attic. This creates a continuous loop—cool air enters low, warm air exits high. That soffit-to-ridge path is the backbone of a healthy ventilation system.
Other exhaust options include gable vents, static roof vents, and powered attic fans. Each has tradeoffs in cost and performance, but all depend on unobstructed intake air to function properly. For readers weighing broader home upgrades, our guide on energy saving tips for summer covers related cooling strategies.
The Science of Convection in Attics
Hot air naturally rises—a basic principle called convection. In summer, attic temperatures can reach 150 degrees Fahrenheit without proper airflow. That heat radiates downward, forcing air conditioners to work harder and raising energy bills.
In winter, warm indoor air leaking into the attic meets cold roof decking and condenses. This moisture can rot wood, grow mold, and shorten roof lifespan by years. Homeowners with lingering questions often turn to community discussions like General questions about attic insulation baffles for real-world troubleshooting perspectives.
Balanced ventilation prevents both extremes, protecting the roof structure and stabilizing indoor comfort year-round.
Types of Baffles and Materials Compared
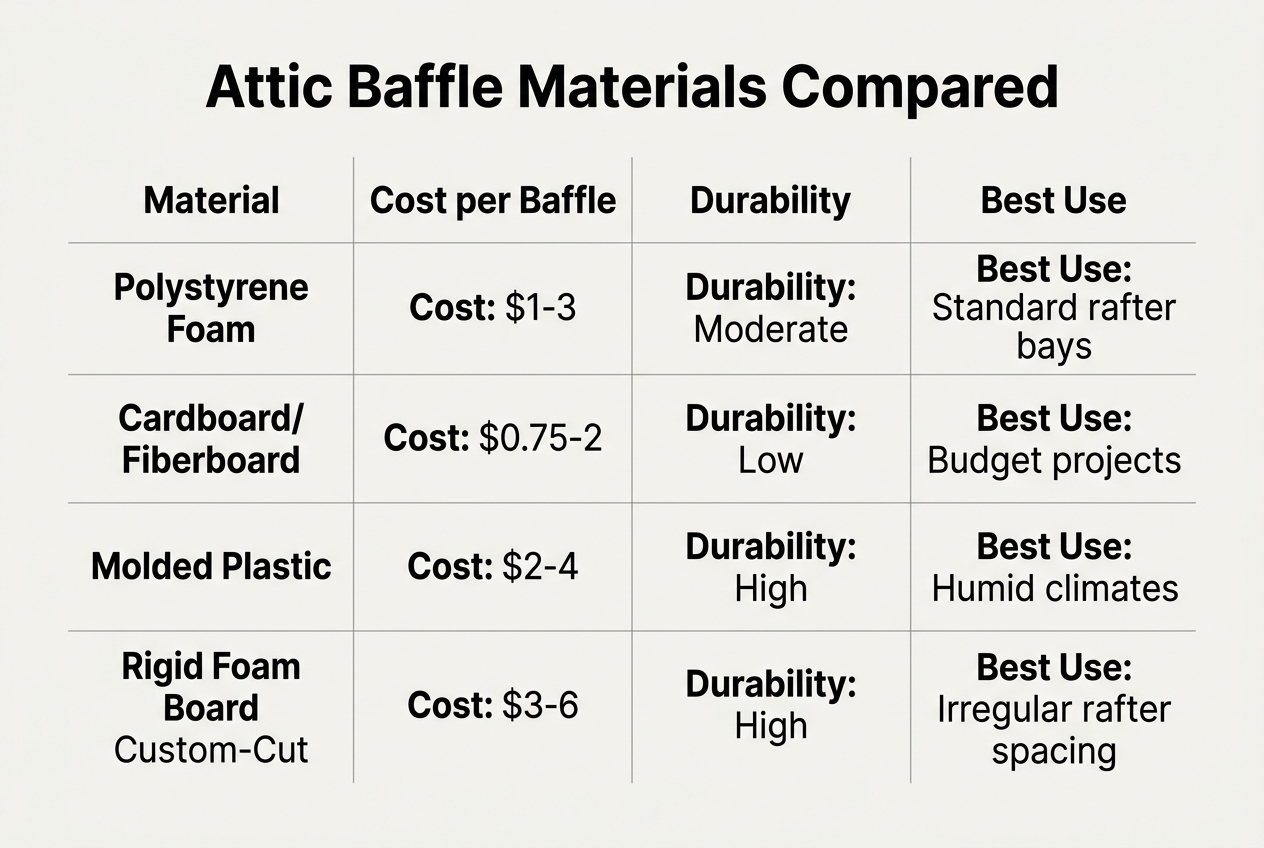
Baffles come in three common materials. Each one balances cost, durability, and ease of installation differently. The table below breaks down the key differences so you can choose the right fit for your attic.
| Material | Rigidity | Typical Cost | Durability | Best Use |
|---|---|---|---|---|
| Polystyrene Foam | Semi-rigid | Low | 5-10 years | Standard rafter bays |
| Cardboard/Paper | Flexible | Very low | 2-5 years | Budget, temporary jobs |
| Rigid Plastic | Rigid | Moderate | 15-25 years | Long-term, humid attics |
Polystyrene Foam Baffles
Foam baffles are the most common choice in hardware stores. They snap into place easily and cost very little per unit. However, foam degrades faster under moisture and heat cycles, especially near roof edges exposed to condensation.
Cardboard and Paper Baffles
Cardboard baffles are the cheapest option, often bundled with attic insulation kits. They work fine short-term, but they absorb moisture and sag within a few seasons. That makes them a poor choice for humid climates or coastal areas of New Jersey.
Rigid Plastic Baffles
Rigid plastic, like the 30 Pack 24 Attic Insulation Baffle, Large Black Durable …, holds its shape for decades. It resists moisture, pests, and crushing from insulation weight. The upfront cost is higher, but durability often makes it the smarter long-term investment. Homeowners weighing bigger upgrades, such as whether are solar panels worth it for their home, should apply the same durability-first thinking to baffle selection.
Signs Your Attic Needs Better Ventilation
Visual Warning Signs
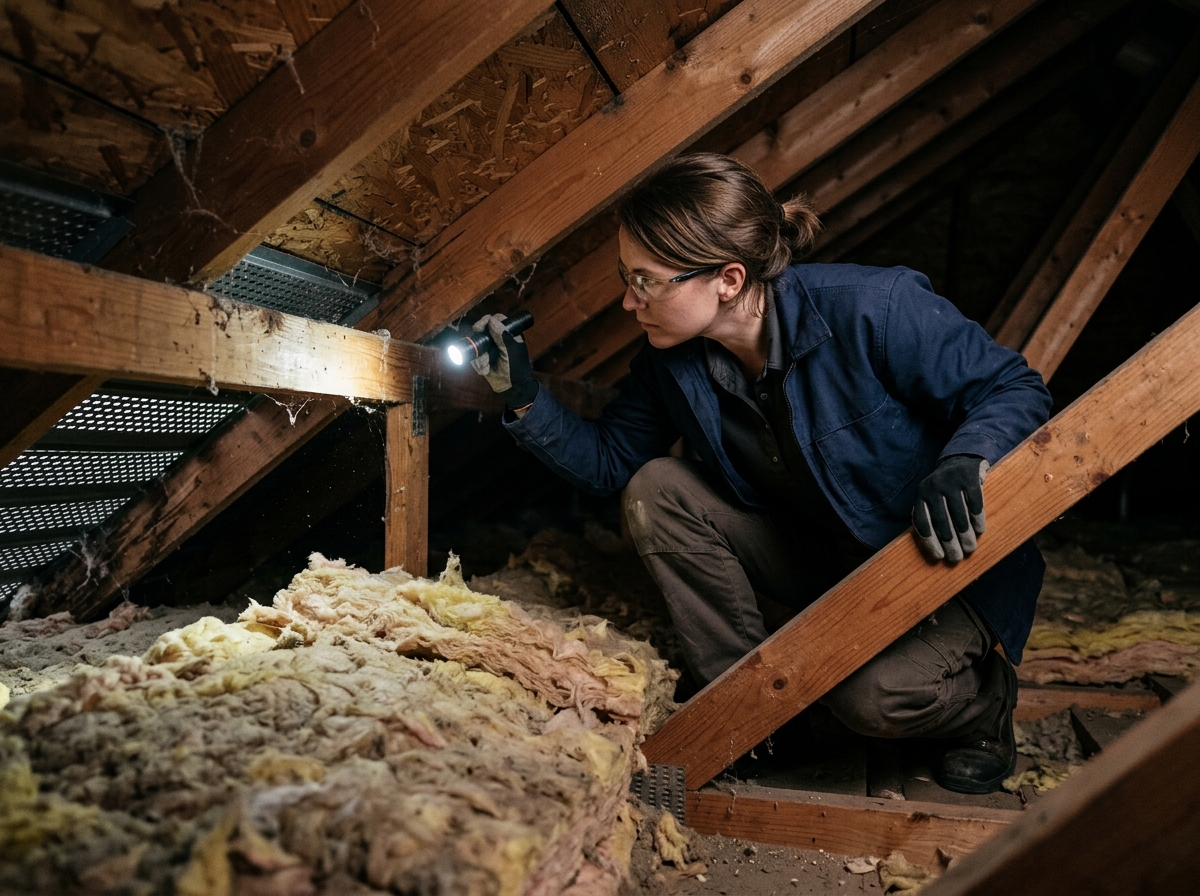
Some clues are easy to spot from outside your house. Others show up in the attic itself. A quick inspection can reveal trapped heat and moisture before they cause real damage. Learn more about Baffles – Building Science Education – Department of Energy to understand why airflow paths matter so much.
- Icicles or thick ice ridges forming along the roof edge, a classic sign of ice dams caused by uneven attic temperatures.
- Dark stains, streaks, or a musty smell near the attic hatch, which often points to trapped moisture and possible mold growth.
- Sagging or discolored roof sheathing, suggesting long-term condensation buildup inside the attic space.
- Visible frost on nails or rafters during cold snaps, a sign warm indoor air is escaping upward.
Seasonal Red Flags
Weather extremes often expose ventilation problems. Summer heat and winter cold each reveal different issues. A stuffy, overheated attic in July can push cooling costs higher, while poor winter airflow encourages ice dams and roof leaks. Rising energy bills, even after weatherstripping or caulking gaps, can also hint at deeper attic issues.
When to Call a Professional
If problems persist despite basic fixes like sealing drafts, it’s time for expert help. A trained technician can assess airflow, insulation depth, and moisture sources together. Many local businesses offering our services also handle related home comfort needs, from attic insulation upgrades to small repairs that support a healthier, more efficient home.
Step-by-Step Installation Process
Tools and Materials Needed
Good preparation makes the job safer and faster. Before climbing into the attic, gather a staple gun, utility knife, tape measure, dust mask, and gloves. A headlamp helps in dark corners. Wear long sleeves to avoid contact with old insulation, and check that your safety gear includes knee pads for crawling across joists.
Installation Sequence
Baffles must sit correctly at the eaves to keep airflow open between the roof deck and the attic floor. The table below outlines the basic sequence many installers follow, including where products like Rafter Vent – Insulation Accessories come into play.
| Step | Task | Key Detail |
|---|---|---|
| 1 | Clear the eave area | Remove old insulation blocking the soffit |
| 2 | Position the baffle | Slide it against the roof deck at the eave |
| 3 | Secure with staples | Attach every 12 to 16 inches |
| 4 | Check alignment | Confirm a clear channel to the soffit vent |
| 5 | Add insulation | Fill around, not over, the baffle |
Common Mistakes to Avoid
A frequent error is stapling baffles too loosely, letting insulation shift and block airflow. Another is covering the soffit opening entirely. Learn more about the standards behind this work on our about us page.
Pairing Baffles With the Right Insulation Approach
Working With Blown-In Insulation
Blown-in insulation is popular for attic upgrades because it fills gaps quickly and reaches tight corners. But loose fill can drift or settle over time, especially near the eaves. Without baffles in place first, blown material buries the soffit vents and chokes off airflow within a year or two.
A properly installed baffle acts like a dam. It holds cellulose or fiberglass fill back from the vent opening while still letting air pass through the channel above. For rafters spaced at standard widths, products like the SmartBaffle insulation baffle for 24″ on-center rafters create a rigid barrier that resists shifting under the weight of blown insulation.
Working With Batt Insulation
Fiberglass batts behave differently than loose fill. They hold their shape, but installers sometimes push them too far into the eaves, compressing the material and covering vents. Compressed batts lose much of their R-value right where protection matters most.
Baffles solve this by giving batts a firm stopping point. Cut batts to end at the baffle’s edge, not beyond it. This keeps the insulation full-thickness across the attic floor while preserving open airflow at the perimeter.
Maintaining Clearance Standards
Most building codes call for at least a one-inch gap between insulation and the roof deck, though two inches is safer for homes with steep rooflines. Check clearance after any attic insulation project, since crews sometimes overfill by mistake. For details on how information is collected during a home energy assessment, homeowners can review a provider’s privacy policy before scheduling one.
Benefits of Properly Installed Baffles
Energy and Cost Savings
Properly placed baffles keep airflow moving without robbing your attic insulation of its power. This teamwork lowers heating and cooling costs year-round. Consistent ventilation means your HVAC system works less to keep temperatures stable, which can translate into noticeable savings on monthly utility bills.
Structural Protection Benefits
Good ventilation protects more than your energy bill. It protects the roof itself. Moisture and heat buildup wear down shingles and decking over time.
- Baffles help extend roof lifespan by preventing trapped heat from prematurely aging shingles.
- They reduce ice dam formation by keeping attic temperatures closer to outdoor conditions in winter.
- They limit moisture accumulation that can warp wood sheathing or promote rot.
- They support even snow melt on the roof surface, lowering the risk of leaks near the eaves.
For homeowners tackling this themselves, the guide on Installing Rafter Vents offers clear, practical steps.
Health and Comfort Improvements
Balanced airflow also improves indoor air quality. It reduces trapped moisture that feeds mold and mildew growth. Fresher attic air means fewer musty odors drifting into living spaces below. Many homeowners pair this upgrade with caulking or weatherstripping for a fully sealed, comfortable home. If you’re unsure where to start, reaching out through our contacts page connects you with guidance suited to your specific attic setup.
DIY Installation vs Professional Services
When DIY Makes Sense
Simple attics with easy access and standard rafter spacing can be good DIY projects. If you’re comfortable on a ladder and can maneuver in tight spaces, installing baffles in a small, unfinished attic may take just a weekend. This works best when the job is straightforward, with no wiring hazards or complex rooflines.
Risks of Improper Installation
Attics are tight, dusty, and full of hazards. Missing a roof truss or stepping through drywall are real risks. Poorly placed baffles can block airflow entirely, causing moisture buildup and mold. The table below compares common outcomes.
| Factor | DIY Approach | Certified Technician |
|---|---|---|
| Skill level needed | Basic carpentry | Trained, code-aware |
| Safety gear used | Varies | Standardized, consistent |
| Airflow accuracy | Often uneven | Measured and verified |
| Time required | 1-2 days | Half a day |
| Follow-up audit | Rarely done | Usually included |
Advantages of Hiring Certified Technicians
Certified crews bring harnesses, respirators, and proper lighting for tight attic spaces. They also catch related issues, like gaps needing caulking or weatherstripping. A professional energy audit adds real value, pinpointing airflow problems homeowners often miss. Many local businesses pair this service with broader home efficiency checks, similar to advice found on this blog.
Maintenance and Long-Term Attic Care
Annual Inspection Checklist
Attics deserve a check-up twice a year. Seasonal inspections catch small problems before they grow. Do one in fall, before cold weather arrives, and one in spring, after winter storms have passed.
Bring a flashlight and check that baffles still sit firmly against the roof deck. Look for gaps near the eaves, sagging cardboard, or bent foam channels. Check soffit vents from outside too. If daylight isn’t visible through vent openings from inside the attic, airflow is blocked.
Many homeowners pair this walk-through with a broader home tune-up. While up there, check for signs of roof leaks, moisture stains, or areas where caulking and weatherstripping around attic hatches need refreshing. A five-minute look twice yearly prevents costly surprises.
Preventing Pest Intrusion
Attics attract mice, squirrels, and insects looking for shelter. Clearing debris regularly removes nesting material before animals settle in. Leaves, twigs, and dust that pile up around baffles also block airflow, so cleaning serves two purposes at once.
Seal small entry points around roof edges, plumbing stacks, and wiring holes. Steel wool and caulk work well for tiny gaps. Larger openings need hardware cloth. Check baffles specifically, since chewed foam or torn cardboard often signals an active pest problem.
Recognizing When Replacement Is Needed
Insulation settles over time, losing loft and effectiveness. Monitoring insulation settling yearly helps homeowners judge whether depth still meets recommended levels. Compressed, damp, or moldy material should be replaced promptly.
Cracked or collapsed baffles need swapping out too. Review examples of completed attic projects in this portfolio to compare against your own attic’s condition.
Financial Assistance and Energy Programs for New Jersey Homeowners
What an Energy Audit Reveals
A professional energy audit looks at your whole home, not just the attic. Technicians check baffle placement, insulation depth, and airflow patterns. They also inspect doors, windows, and appliances for hidden energy loss. Many audits use a blower door test to measure air leakage in cubic feet per minute.
The results usually point to several fixes: caulking around window frames, weatherstripping on exterior doors, and sealing gaps near attic hatches. Auditors often recommend LED light bulb replacement and showerhead and aerator swaps too. Some homeowners browse a gallery of completed projects to see what these upgrades look like before scheduling work.
Qualifying for Assistance Programs
New Jersey’s Comfort Partners Program helps income-eligible households reduce energy costs at no charge. Eligibility depends on household size and income, generally set near 60% of the state median. A family of four typically qualifies with an annual income under roughly $75,000, though limits shift yearly.
Renters and homeowners can both apply, provided they pay their own utility bills. Applicants usually submit proof of income, a recent utility bill, and household size documentation. Local community action agencies often help process these applications quickly.
Steps to Get Started
Start by requesting a home energy audit through your utility provider or a certified contractor. Ask directly whether you meet Comfort Partners income guidelines during that first call.
Once approved, crews schedule free services like attic insulation, gas leak repair, and light home repair. Many local businesses coordinate these visits within a few weeks of approval.
Getting your attic baffles and insulation right isn’t a job to leave to guesswork, and that’s where NECINJ comes in. As Northeast Energy Conservation, Inc., their team brings expert energy audits and insulation know-how to every home, and through the New Jersey Comfort Partners Program, income-eligible customers can even access these services free of charge. If you’re ready to stop losing energy through your attic, reach out to NECINJ to book an assessment and see what a properly ventilated, well-insulated attic can do for your comfort and your bills.
