


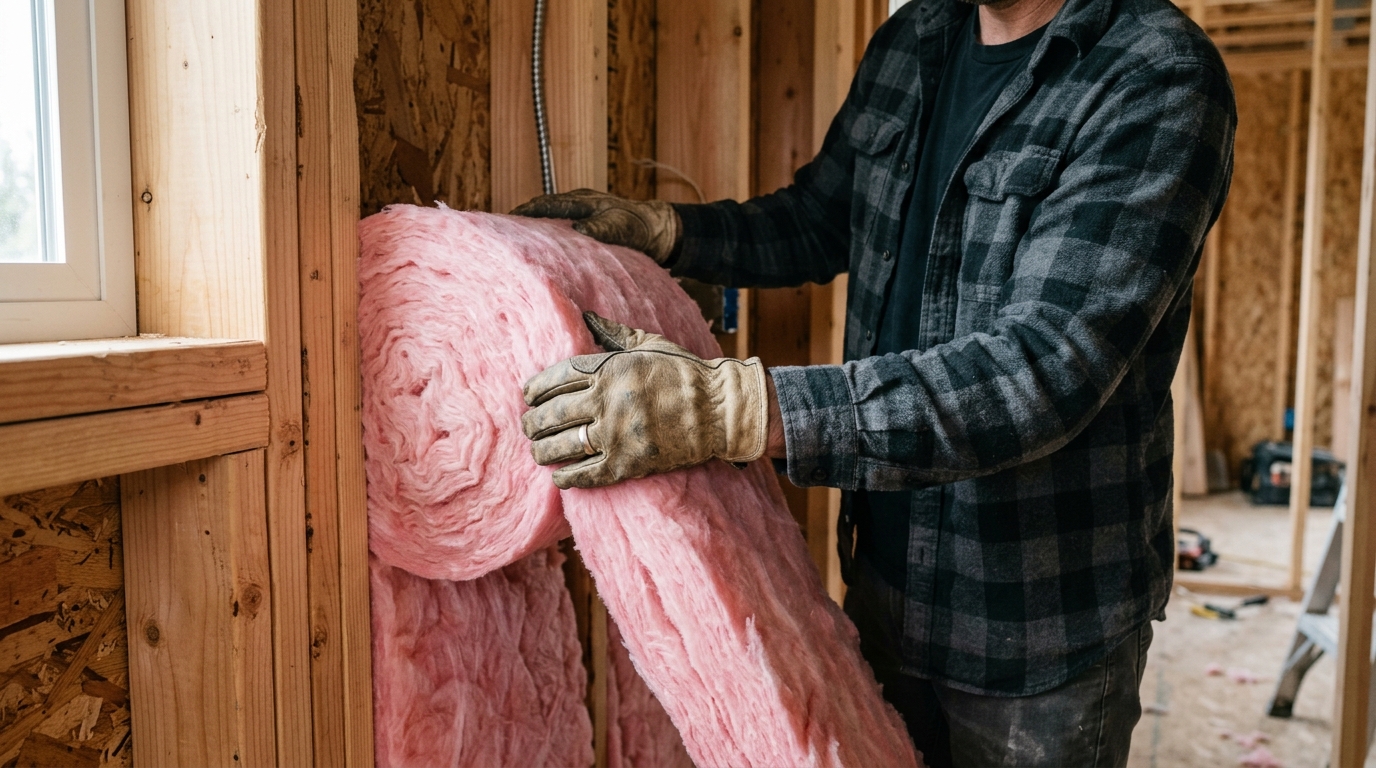
Staring at insulation options while your energy bills climb and your walls feel cold to the touch is a frustrating spot for any homeowner, especially when terms like “R-value” seem built to confuse rather than help. R13 insulation is one of the most commonly specified products for exterior wall cavities. Yet many homeowners install it without knowing whether it’s the right thickness, material, or R-value for their climate zone and framing type. This guide breaks down what R13 insulation costs installed, how it stacks up against alternatives like R15 and R19, and where it belongs in your home. That way you can make a confident, code-compliant decision in 2026.
What Is R13 Insulation and Why R-Value Matters
How R-Value Is Measured
R-value measures how well a material resists heat flow. Testing labs measure it under controlled conditions, tracking how much heat passes through over time. The higher the number, the slower heat moves through it.
This measurement accounts for thickness and density. A thicker batt of the same material traps more air pockets, and those pockets slow heat transfer. That’s why a product like the R- 13 Faced Fiberglass Insulation Roll 15 in. x 32 ft. (1… is built to a specific thickness to hit its rated performance.
Why Higher Isn’t Always Better
Homeowners often assume a bigger number always wins. That’s not quite true. R-13 works best in 2×4 wall cavities, where space is limited. Cramming a higher-rated batt into that same cavity compresses the fibers, which actually lowers real-world performance.
Matching R-value to the space matters more than chasing the highest rating available. A wall built for R-13 gets full benefit from that rating. Overstuffing it wastes money and cuts effectiveness.
The Role of Insulation in Home Energy Efficiency
Insulation works alongside other upgrades to cut energy waste. Caulking, weatherstripping, and attic insulation all seal gaps that let conditioned air escape. Together, these steps ease the strain on heating and cooling systems.
Lower energy use means lower bills and steadier indoor comfort. Some homeowners pair insulation upgrades with renewable options, and many wonder whether are solar panels worth it once their home is properly sealed and insulated first.
Core Characteristics of R13 Insulation
Standard Thickness and Density
R13 batts typically measure about 3.5 inches thick. This matches the depth of a standard 2×4 wall stud cavity. The density is moderate, giving enough fiber mass to slow heat transfer without overstuffing the space.
Manufacturers balance thickness against compression. Cramming a batt into a smaller gap reduces its effectiveness. A properly sized R13 batt fills the cavity fully, without gaps or bunching, so the fibers trap air pockets as designed.
Common Materials Used for R13
Fiberglass is the most common material for this R-value. It comes in kraft-faced, foil-faced, or unfaced rolls. A widely used option is the Owens Corning R-13 Pink Kraft Faced Fiberglass batt, sized for standard 2×4 walls.
Mineral wool and cotton batt alternatives also reach R13 at similar thickness. Both resist fire well and handle moisture better than basic fiberglass. Cost differs, so many homeowners compare options before choosing.
Where R13 Performs Best
R13 performs best in exterior walls of moderate climates. It also suits interior partition walls where sound dampening matters more than extreme thermal resistance. Real-world results depend heavily on installation quality and air sealing.
Pairing insulation with caulking, weatherstripping, and attic insulation upgrades improves whole-house performance. For broader strategies, review these energy saving tips for summer to maximize comfort year-round.
Best Applications and Recommended Uses
Exterior Wall Applications
R13 insulation fits standard 2×4 wall cavities found in most American homes. A 2×4 stud wall measures 3.5 inches deep, matching this product’s thickness almost perfectly. This snug fit avoids compression, which can drag actual performance below the rated value. Products like Knauf® Performance+® R-13 Kraft-Faced Fiberglass batts show this exact sizing in a widely available format.
Additions and Renovation Projects
This material shows up often in home expansions and remodeling work. Consider these common uses:
- Framing new room additions built with standard 2×4 exterior walls;
- Insulating interior partition walls for soundproofing between bedrooms or bathrooms;
- Filling stud bays during renovations that expose old, uninsulated wall cavities;
- Pairing with attic insulation upgrades as part of broader projects to improve energy efficiency;
- Supplementing garage or basement walls that border heated living space.
Climate Zone Considerations
This R-value suits moderate climates best, where winters and summers stay relatively mild. Homes in harsher northern regions typically need higher R-values for adequate protection.
R13 vs R19: Comparing Cost, Value, and Application
Thickness and Fit Differences
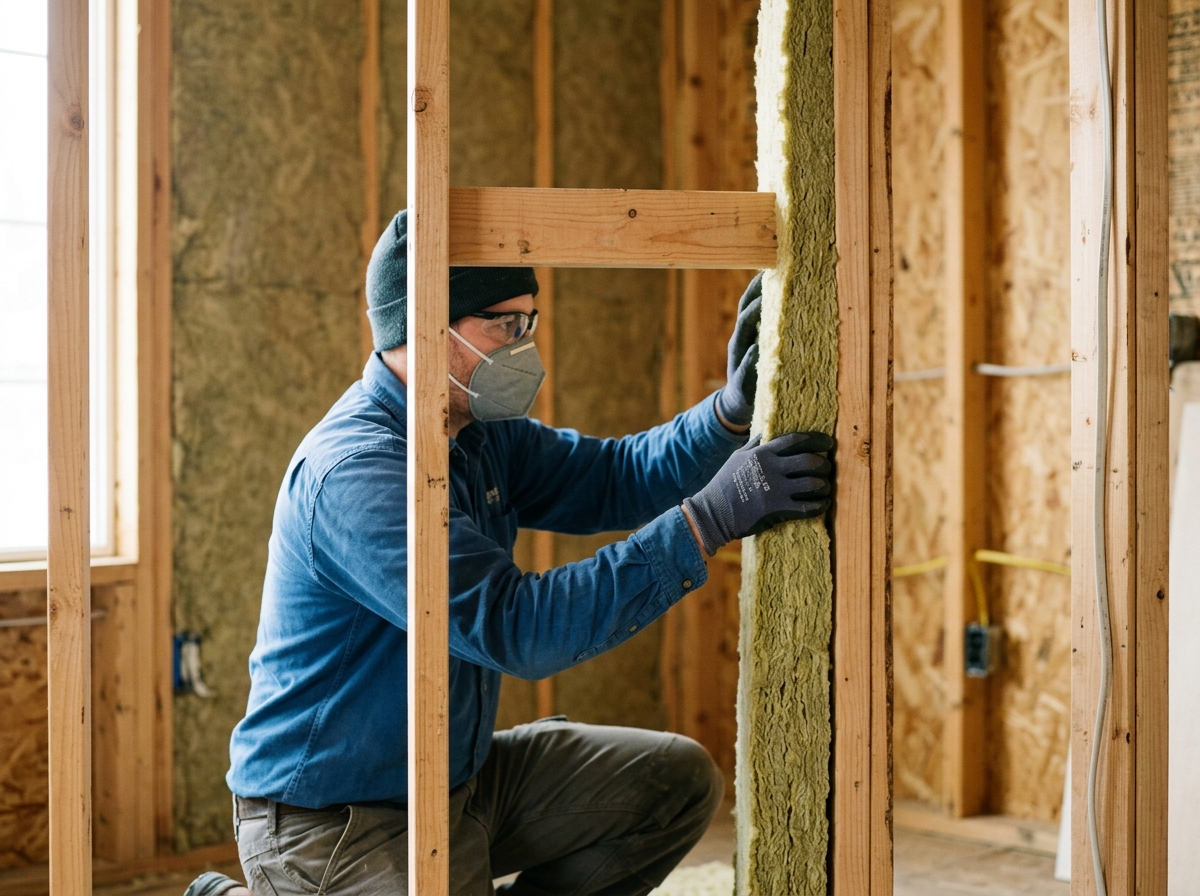
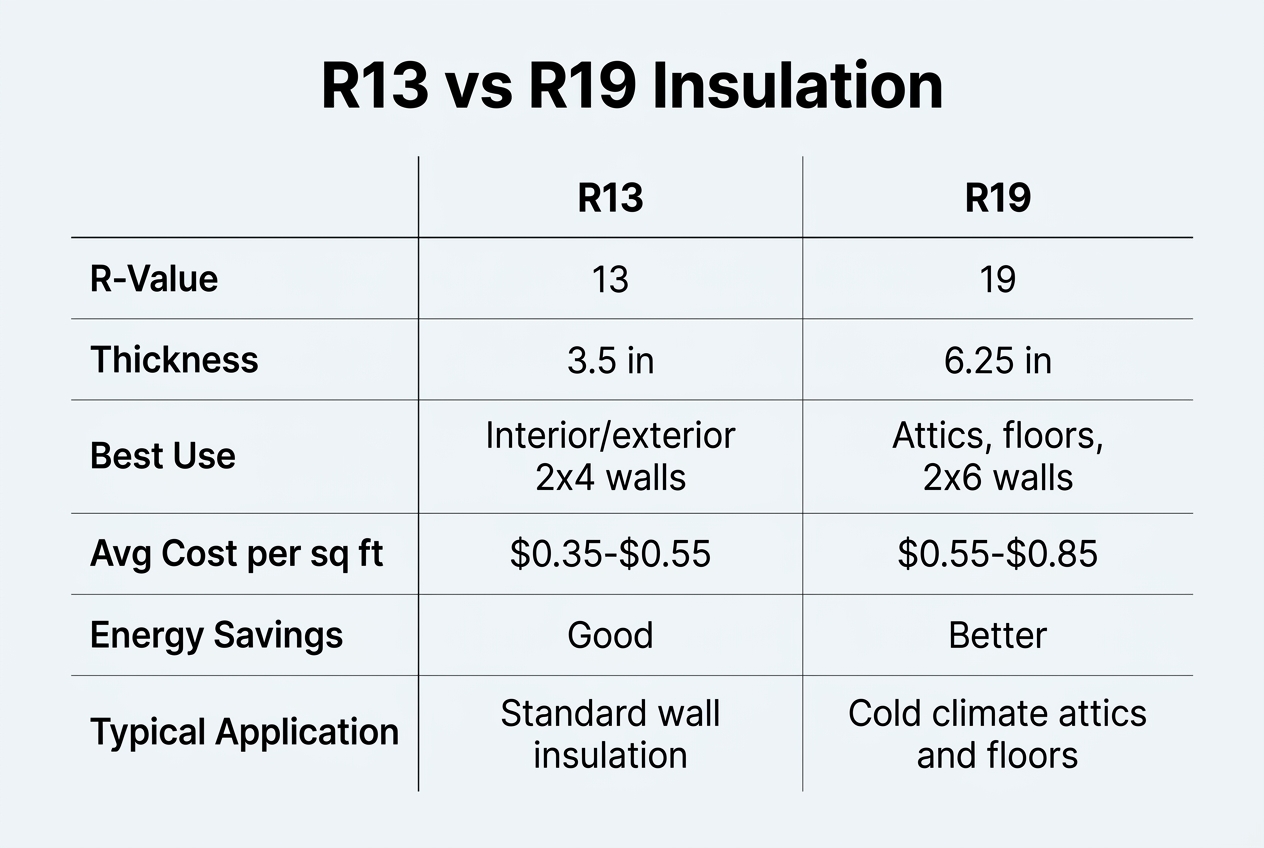
R13 and R19 batts look similar but fit different spaces. R13 is thinner, made for 2×4 wall cavities. R19 is thicker and built for 2×6 walls or attic floors. Using the wrong one causes compression, which lowers performance. For a deeper technical breakdown, this guide on R13 vs R19 Insulation: Here’s the Differences is worth reading.
| Feature | R13 | R19 |
|---|---|---|
| Thickness | 3.5 inches | 6.25 inches |
| Typical Cavity | 2×4 walls | 2×6 walls, attics |
| Cost per Sq Ft | $0.40–$0.65 | $0.55–$0.85 |
| Best Climate Use | Mild regions | Cold regions |
Price Comparison Per Square Foot
R19 typically costs 20-30% more per square foot than R13. The higher price reflects added material and thickness. For a 1,200 square foot home, that gap can mean a few hundred dollars in material costs alone.
Energy Savings Potential Over Time
Higher R-value means steadier indoor temperatures and lower heating bills. Homeowners often pair upgrades with attic insulation, caulking, and weatherstripping for compounding savings. Reviewing our services can help you compare full home energy options before choosing a product.
Choosing the Right Insulation Material Type
Reaching R13 is possible with several materials, but each behaves differently over time. Material choice affects cost, comfort, and how long the insulation performs well. A quick discussion among homeowners on Insulation -R13 enough for exterior walls? shows just how many options people weigh before deciding.
Fiberglass Batts and Rolls
Fiberglass batts are the most common way to hit R13 in a standard 2×4 wall. They’re affordable and easy to cut, though gaps around outlets or wiring cut into their real-world performance.
Spray Foam and Rigid Foam Options
Spray foam seals cracks that batts miss and resists moisture well, making it useful near bathrooms or kitchens where showerhead and aerator replacement work happens. Rigid foam boards add R-value in thin layers, good for tight spaces.
Blown-In Alternatives
Blown-in cellulose or fiberglass fills irregular cavities and older attics without removing drywall. It settles slightly over decades, so periodic checks matter.
| Material | Cost per sq ft | Moisture Resistance | Typical Lifespan |
|---|---|---|---|
| Fiberglass Batt | $0.40–$1.00 | Low | 20–30 years |
| Spray Foam | $1.50–$3.50 | High | 50+ years |
| Rigid Foam Board | $0.80–$1.80 | High | 40+ years |
| Blown-In Cellulose | $0.60–$1.20 | Moderate | 20–25 years |
Many local businesses pair insulation upgrades with caulking and weatherstripping to stop drafts entirely. If you’re unsure which material suits your home, reviewing a company’s about us page can clarify their experience with each type.
Installation Considerations and Common Mistakes
Preparing the Cavity Before Installation
Before any batt goes into a wall or ceiling, the cavity needs attention. Remove old debris, check for pests, and look for electrical wires that need rerouting or notched blocking. A clean, dry cavity helps the insulation perform as designed.
Check framing depth first. Standard 2×4 walls call for R13 batts sized around 3.5 inches thick. Deeper cavities may need a thicker product, so measure before buying. Products like Owens Corning R-13 Unfaced Fiberglass Insulation Batts come in several widths to match common stud spacing.
This is also a smart time to handle nearby repairs, like light home repair or wiring fixes, since walls are already open and accessible.
Avoiding Gaps, Compression, and Voids
Proper fit matters more than most homeowners realize. Cramming a batt into a tight space compresses the fibers, reducing its effective R-value. Loose-fitting batts, on the other hand, leave gaps where air moves freely.
Voids around outlets, pipes, and corners are common mistakes. Even small gaps, just an inch or two, can cut insulation performance noticeably. Cut batts to fit snugly around obstacles, rather than stuffing scraps in loosely, to keep coverage even.
Air sealing before insulating matters just as much as the batt itself. Caulking and weatherstripping around penetrations stop drafts that insulation alone can’t block.
When to Hire a Professional Installer
DIY installation can save money, but mistakes are costly to fix later. A professional installer knows proper vapor barrier placement, which varies by climate and wall assembly.
Complex spaces, like attics with wiring or vents, often benefit from trained hands. Many local businesses also handle related upgrades, such as attic insulation or LED light bulb replacement, during the same visit. Review a company’s privacy policy before scheduling any in-home energy assessment.
Step-by-Step Guide to Installing R13 Batts
Good results depend on careful steps, not guesswork. If you want more background before starting, What is R13 Insulation? Here’s What You Should Know covers the basics well. The table below breaks the job into clear stages.
| Step | Task | Key Detail |
|---|---|---|
| 1 | Measure cavity | Check height and width; add nothing extra, batts should match the space exactly |
| 2 | Cut batt | Use a straightedge and sharp utility knife; cut on a flat surface for clean edges |
| 3 | Fit into cavity | Press gently into place; avoid compressing fibers, which lowers R-value |
| 4 | Secure vapor barrier | Staple facing tabs every 8 inches along studs |
| 5 | Seal seams | Tape joints and seal gaps around outlets, pipes, and wiring |
Measuring and Cutting Batts
Measure each wall cavity before cutting. Standard stud bays run 14.5 inches wide, but older homes vary. Cut batts slightly oversized, about a quarter inch, so they hold their shape without gaps.
Fitting and Securing in Wall Cavities
Fit batts snugly, but never force or squeeze them. Compressed fiberglass loses insulating power fast. Fill around wiring and outlet boxes by splitting the batt rather than crushing it flat.
Sealing Seams and Penetrations
Seal every seam and penetration to stop air leaks. Pair this work with caulking and weatherstripping around nearby windows for a tighter envelope. If you’re unsure about proper technique, reach out through contacts for guidance before you begin.
Signs Your Home Needs an Insulation Upgrade
Common Symptoms of Under-Insulated Walls
Your home often gives clear warning signs before bills spike. Drafts near outlets or baseboards usually mean insulation has gaps or has thinned out. Uneven room temperatures, where one room feels cold and another warm, point to the same problem. Many homeowners also notice rising heating and cooling costs even though usage habits haven’t changed.
- Rooms feel drafty near windows, outlets, or baseboards even when doors and windows are closed;
- Upstairs and downstairs temperatures differ noticeably, showing uneven heat distribution;
- Monthly energy bills climb steadily without any change in thermostat habits;
- Insulation appears flattened, damp, or discolored when viewed in the attic or walls;
- Icicles or ice dams form along the roofline during winter months;
- Musty odors or visible moisture appear near exterior walls or ceilings.
How a Professional Energy Audit Identifies Gaps
An energy audit uses thermal imaging and blower-door testing to find hidden air leaks. Technicians check walls, attics, and rim joists for weak spots. They often pair findings with caulking, weatherstripping, and attic insulation recommendations to close gaps efficiently. Reading the blog beforehand can help homeowners understand what an audit typically involves.
Comparing Current R-Value to Recommended Standards
Aging insulation loses effectiveness over time, sometimes dropping well below its original R-value. Comparing current performance to recommended standards shows whether an upgrade makes sense now or can wait.
Cost Factors and Available Financial Assistance
Typical Installation Cost Ranges
Material costs for R13 batts run about $0.40 to $1.00 per square foot, depending on brand and fiber type. Labor adds another $0.50 to $1.50 per square foot for most homes. A typical 500-square-foot wall project often totals $600 to $1,200 installed. DIY installation cuts costs but demands careful handling and safety gear.
Prices shift based on wall access, existing insulation removal, and home age. Older homes with knob-and-tube wiring or cramped stud cavities may need extra prep work. Many local businesses bundle insulation with related upgrades, like caulking or weatherstripping, to reduce overall labor time and cost per job.
Calculating Long-Term Energy Savings
Proper insulation delivers real long-term ROI through lower heating and cooling bills. Homeowners typically see annual savings of 10% to 15% on energy costs after upgrading underinsulated walls. Over a 10-year span, that can mean $1,000 or more in avoided utility expenses, depending on climate and home size.
Pairing insulation with LED light bulb replacement, showerhead and aerator upgrades, or appliance replacements compounds savings further. Reviewing a completed portfolio of past projects can help homeowners estimate realistic payback timelines before committing to work.
Rebates and Assistance Programs for Eligible Homeowners
Many states offer rebates for insulation upgrades, sometimes covering 50% or more of project costs. Utility companies frequently fund energy audits that identify eligible improvements, including attic insulation and gas leak repair.
Income-eligible households often qualify for free or reduced-cost services through state comfort partner programs. These programs prioritize no-cost weatherization for qualifying residents, making insulation upgrades accessible regardless of budget constraints.
Sustainable and Advanced Insulation Innovations
Advanced Rigid Foam and Polyiso Products
Rigid foam boards are changing how homeowners boost efficiency without losing space. Polyisocyanurate (polyiso) offers R-values near 6.0 per inch, nearly double standard fiberglass batts. This makes it useful for tight wall cavities or rooflines where thickness is limited.
Manufacturers now produce polyiso with reflective foil facings that reduce radiant heat transfer in attics. Some products include pre-taped seams, cutting air leakage during installation. These upgrades pair well with existing attic insulation, adding a continuous thermal layer over rafters or joists that traditional batts alone can’t achieve.
Sustainability in Manufacturing and Installation
Insulation choices carry real environmental weight. Fiberglass and mineral wool now often include recycled content, sometimes exceeding 50 percent. Spray foam manufacturers have also shifted toward low-global-warming-potential blowing agents, cutting emissions tied to production.
Installation practices matter too. Sealing gaps with caulking and weatherstripping before adding insulation prevents wasted material and energy loss. Many local businesses now combine these small repairs with larger insulation projects, creating a more complete efficiency upgrade. You can browse completed examples of this layered approach in this gallery of finished home projects.
Future Trends in Home Insulation
Building codes are tightening minimum R-value requirements nationwide. Homeowners upgrading insulation often pair the work with LED light bulb replacement or showerhead and aerator replacement, tackling multiple efficiency goals at once.
Smart moisture sensors embedded in insulation are also emerging, alerting homeowners to hidden leaks before mold develops. Combined with routine gas leak repair checks, these tools point toward homes that monitor their own performance year-round.
Before you commit to new ductwork or a duct cleaning appointment, it’s worth asking how much of your comfort problem actually lives in the ducts and how much lives in the shell of the house — a drafty attic hatch, an unsealed rim of framing, or gaps around windows and doors can undo whatever a sealed duct system gains you. A reputable duct contractor should be able to show you pressure readings or before-and-after numbers rather than just a visual argument, and it’s fair to ask what portion of the leakage they measured is in the ducts versus the envelope. If the answer points more toward the building itself, air sealing work like caulking and weatherstripping, paired with adequate attic insulation, tackles the same goal of keeping conditioned air where you paid to put it — often for considerably less than a full duct overhaul.
