


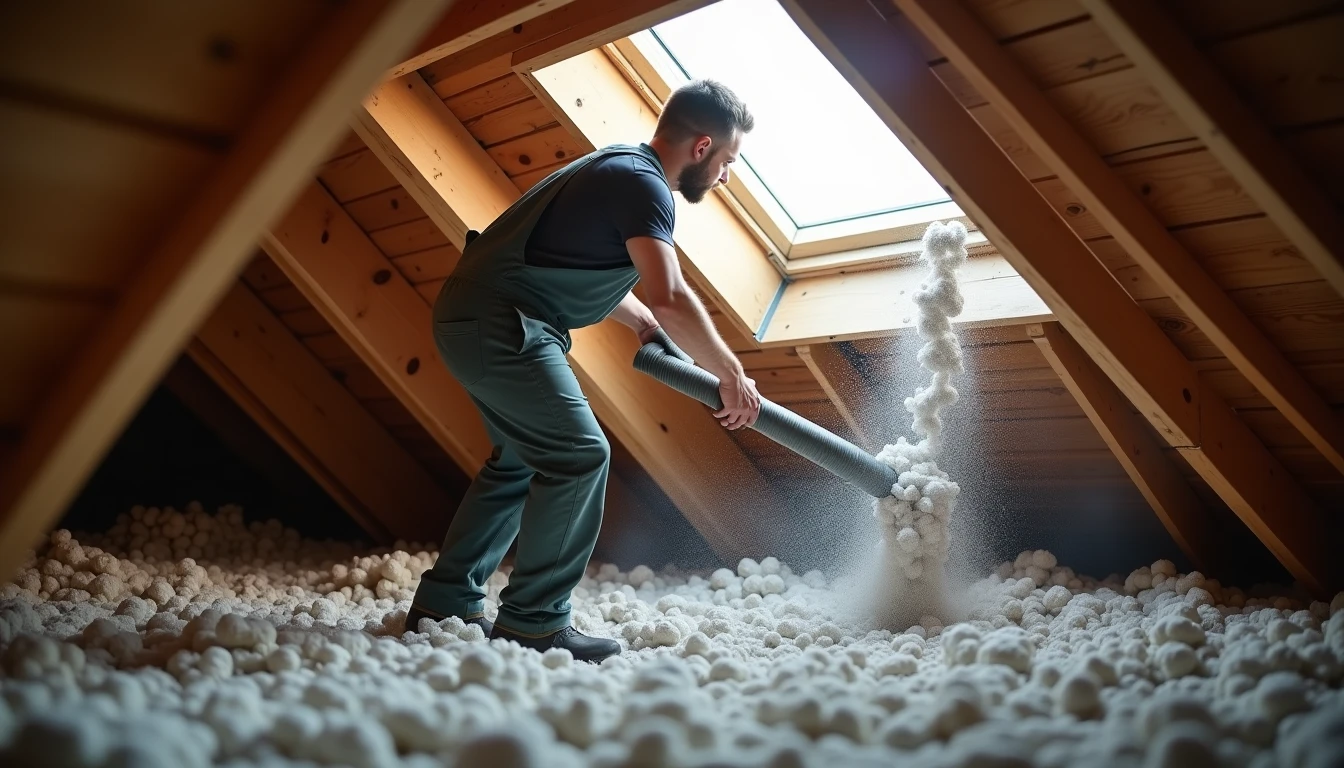
Every winter, homeowners across New Jersey watch their heating bills climb while cold drafts creep through walls and attics that were supposedly insulated decades ago. Usually the problem is insulation that has settled, broken down, or was never installed to modern standards. That leaves your home working harder than it should just to stay comfortable. Blown in insulation is one of the most effective and least invasive fixes, filling gaps and cavities that traditional batts simply can’t reach. This guide covers what you need to know in 2026, from material choices and costs to what real energy savings look like for homes in our region.
What Is Blown-In Insulation and How Does It Work
How the Blowing Machine Works
A blowing machine breaks apart bags of insulation material and pushes it through a long hose using air pressure. The installer aims the hose into attics, walls, or floor cavities. Material sprays out in small pieces and settles into place, filling gaps that rigid boards or batts often miss. It’s one of many projects to improve energy efficiency homeowners can knock out in a single day.
The machine’s settings control how much air mixes with the material. More air makes a fluffier, lighter fill. Less air packs it tighter for denser coverage. Technicians adjust these settings based on the cavity being filled and the target R-value, which measures insulation’s resistance to heat flow.
Loose-Fill vs Dense-Pack Applications
Loose-fill installation is standard for open attics. Material gets blown freely across the attic floor, building up to a specific depth — often 12 to 16 inches for modern R-value targets. It sits loosely, trapping air pockets that slow heat transfer between living spaces and the outdoors.
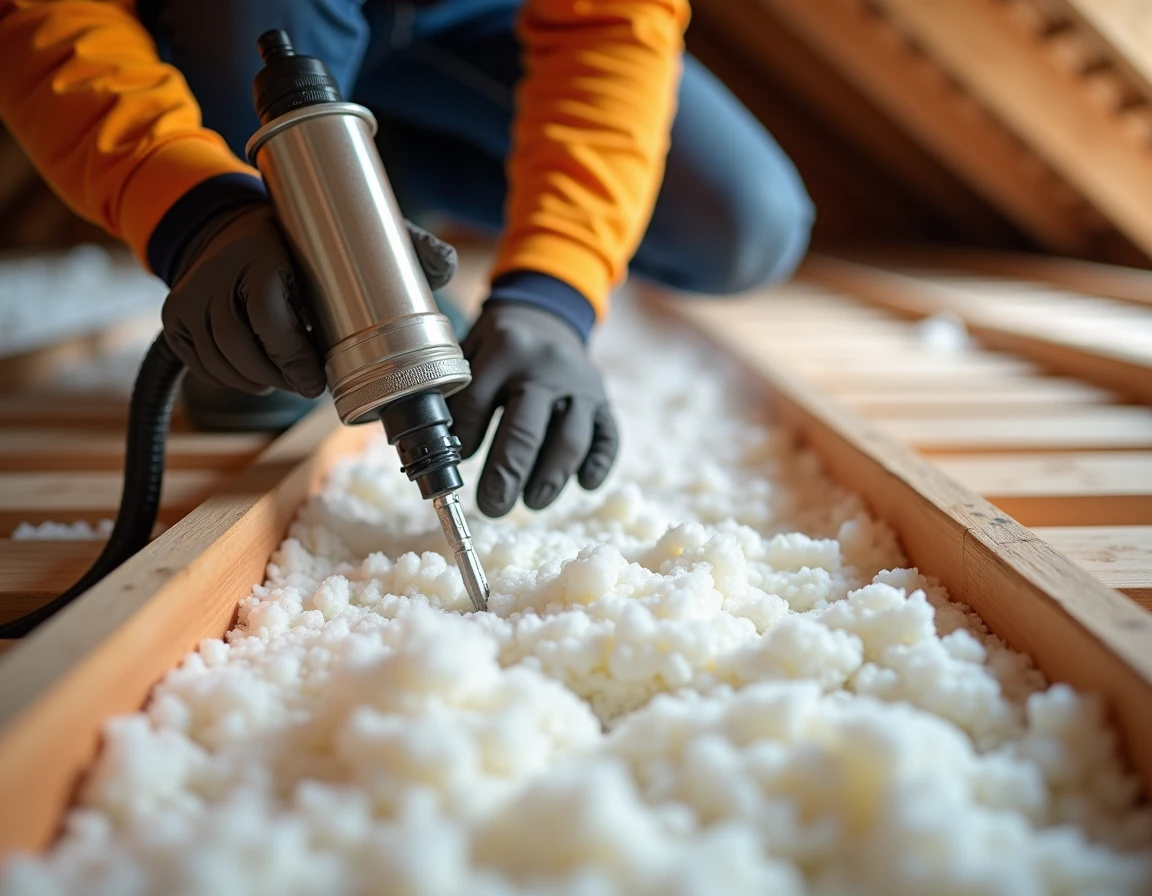
Dense-pack is different. It’s used inside enclosed wall cavities, where the material has to be packed tight so it doesn’t settle over time. Installers drill small holes and pack the cavity at higher pressure, sometimes tripling the density used in open attics. This method shows up often during renovations, when walls are already open for other work anyway.
Where It’s Commonly Installed in a Home
Attics get the most attention, since heat naturally rises and escapes through poorly insulated ceilings. Blown-in Insulation also works well in exterior walls, rim joists, and floors above unheated basements or crawl spaces.
Many contractors pair this upgrade with caulking, weatherstripping, and existing attic insulation improvements. Together, these steps close the small gaps that let conditioned air escape, giving the whole home a more complete seal.
Key Benefits of Upgrading Your Home’s Insulation
Lower Heating and Cooling Costs
Old or thin insulation lets conditioned air leak through walls and attics. Fresh material creates a tighter thermal barrier, so furnaces and air conditioners don’t have to work as hard. Many homeowners notice a real drop in monthly utility bills after the upgrade. Pairing insulation with caulking and weatherstripping around windows and doors pushes those savings even further.
Some homeowners also look into renewable options once the home is properly sealed. It’s worth asking whether are solar panels worth it for your specific roof and energy usage before committing to that added investment.
Better Indoor Air Quality and Comfort
Gaps in old insulation let dust, pollen, and outdoor pollutants seep indoors. Filling those gaps keeps indoor air cleaner and steadier. Consistent temperatures from room to room mean fewer cold spots near floors or ceilings.
- Rooms stay closer to the same temperature year-round, reducing the need to constantly adjust thermostats.
- Fewer drafts near outlets and baseboards make living spaces feel noticeably cozier in winter.
- Reduced moisture infiltration helps prevent mold growth inside wall cavities and attic spaces.
- Combining insulation upgrades with LED light bulb replacement and appliance updates can further trim energy waste.
- Homeowners weighing DIY versus hiring help often find useful firsthand accounts, like this Blow-in Insulation. DIY or Pro? : r/HomeImprovement discussion.
Noise Reduction Advantages
Dense insulation material absorbs sound waves, quieting traffic noise, neighbors, and household chatter between rooms. This soundproofing effect is especially valuable in shared walls or busy neighborhoods. The same material also resists moisture buildup, which protects wood framing from rot over time.
Comparing Blown-In Insulation Materials
R-Value and Cost Comparison
Three materials dominate the market: cellulose, fiberglass, and mineral wool. Each strikes a different balance of R-value, price, and performance. The table below breaks down the basics so you can compare options before hiring a crew.
| Material | R-Value per Inch | Avg. Cost per Sq. Ft. | Fire Rating |
|---|---|---|---|
| Cellulose | 3.2–3.8 | $1.00–$1.50 | Treated, fire-retardant |
| Fiberglass | 2.2–2.7 | $0.90–$1.40 | Naturally non-combustible |
| Mineral Wool | 3.0–3.3 | $1.50–$2.00 | Excellent, melts near 1,800°F |
Cellulose gives strong value per dollar. Mineral wool costs more but adds superior fire protection.
Fire and Moisture Resistance
Fiberglass resists fire naturally since it’s made from glass fibers. Cellulose needs chemical treatment, usually borate, to meet code. Mineral wool stands out for moisture handling too. It repels water and resists mold better than the other two, making it a smart pick for damp basements or coastal homes.
Eco-Friendliness of Each Option
Cellulose wins on recycled content, often made from 80% post-consumer paper. Fiberglass uses recycled glass but needs more energy during manufacturing. Mineral wool comes from natural rock and industrial waste, offering durability without frequent replacement. Whichever material you choose, pairing it with caulking, weatherstripping, and following energy saving tips for summer boosts overall efficiency. Try the Blown-In Insulation Calculator to estimate material needs before your project begins.
Blown-In vs Other Insulation Methods
Blown-In vs Batt Insulation
Batt insulation comes in pre-cut rolls. It fits standard stud bays but leaves gaps around pipes, wires, and odd angles. Loose-fill material conforms to any space, closing those small gaps that batts miss. Installation differs too. Batts need cutting, fitting, and stapling by hand. Loose-fill gets blown in through a hose, often finishing an attic in a single afternoon.
Blown-In vs Spray Foam
Spray foam air-seals and insulates at the same time. It costs more per square foot and needs curing time before the space is usable again. Blown-in options skip the curing wait and cost noticeably less installed. For homeowners weighing tradeoffs, this video explains it well: Your Blown Insulation Strategy SUCKS – DO THIS INSTEAD.
Cost and Performance Summary
The table below compares typical costs and timelines across four common methods.
| Method | Avg Cost per Sq Ft | Install Time (Attic) | Air Sealing |
|---|---|---|---|
| Loose-Fill (Blown-In) | $1.00–$1.75 | 3–5 hours | Moderate |
| Batt/Roll | $0.90–$1.50 | 6–8 hours | Low |
| Spray Foam | $1.50–$3.50 | 1–2 days plus curing | High |
| Rigid Board | $1.20–$2.50 | 1–2 days | Moderate |
Beyond insulation, many local businesses bundle related upgrades like weatherstripping and caulking into our services for a fuller energy-saving package.
Why Professional Installers Move Faster with Loose-Fill Material
Speed and Efficiency on Installation Day
Loose-fill material moves through a hose fast. A trained crew can insulate an entire attic in a few hours, not days. Speed matters because it keeps labor costs down and gets your home comfortable sooner.
Most crews work in teams of two. One feeds the machine, the other guides the hose. This setup lets them cover 1,500 square feet or more in a single visit, often wrapping up before lunch on smaller homes.
Simplified Handling and Setup
Bagged fiber is easy to load and transport. There’s no cutting, no measuring rigid boards, no fitting pieces around wiring or pipes. This simplified handling cuts prep time dramatically compared to batts or rigid foam.
Because the material flows and settles on its own, installers skip many steps other products require. Learn more on our about us page about how trained teams approach every job with this efficiency in mind.
Minimizing Job-Site Disruption
Modern blowing machines run quietly and connect to a single hose line, so crews avoid dragging heavy equipment through living spaces. Setup usually happens outside, near an attic hatch or vent.
This approach, detailed by manufacturers like Blown-In Insulation producers, keeps dust and debris contained. Homeowners can often stay in nearby rooms during work, unlike projects involving demolition or drywall repair.
Industry Standards and Building Code Requirements
Recommended R-Values by Region
New Jersey sits in Climate Zone 4 and 5, depending on the county. The Department of Energy recommends attic R-values between R-49 and R-60 for these zones. Walls typically need R-13 to R-21, while floors above unheated spaces call for R-25 or higher.
These numbers reflect real winter demands. A poorly insulated attic in Zone 5 can lose three times more heat than one meeting current recommendations. Homeowners comparing options often research material coverage rates, and resources like Loose Fill Insulation at Menards® show how bag counts translate into finished R-value across different depths.
Certification and Quality Standards
Quality installations follow standards set by ASTM International and the North American Insulation Manufacturers Association. Certified installers use calibrated blowing machines to hit target density and thickness, avoiding gaps that reduce performance.
Testing after installation matters too. Blower door tests and infrared scans confirm coverage. This verification step catches thin spots before they cause long-term energy loss or moisture problems.
Local Code Compliance Considerations
New Jersey follows the International Energy Conservation Code, updated periodically with stricter requirements. Permits and inspections are often required for major insulation upgrades, especially when paired with other work like attic insulation or air sealing.
Many local businesses stay current on code changes to keep projects compliant. Homeowners should also review a contractor’s privacy policy before scheduling an energy audit, since scheduling often involves sharing home details online.

How to Choose the Right Insulation for Your Home
Assessing Your Home’s Current Insulation
Start by checking your attic. Look at depth, coverage, and any dark, matted spots — matted insulation often means moisture damage. Note your home’s age, roof condition, and any past repairs. If you’d rather look before you leap, the DIY Guide To Blown-In Attic Insulation walks through basic inspection steps before you decide on a bigger project.
Matching Material to Climate and Budget
Your climate zone, budget, and long-term goals should guide your material choice. Colder regions often need higher R-values, while a tight budget may push homeowners toward fiberglass over cellulose. Think about how long you plan to stay in the home, too. A five-year owner and a twenty-year owner may land on different choices.
Signs You Need an Upgrade
Some problems point clearly to inadequate insulation. Watch for these warning signs:
- Rooms that feel drafty or uneven in temperature from floor to floor.
- Rising heating and cooling bills without any change in usage habits.
- Ice dams forming along the roofline during winter months.
- Visible gaps, thin spots, or pest damage in attic insulation.
- Pipes that freeze or walls that feel cold to the touch.
If several of these apply, talk to a professional energy auditor before buying materials. Small fixes like caulking, weatherstripping, and LED light bulb replacement help, but a full audit reveals hidden gaps a homeowner might miss. For a professional evaluation, reach out through these contacts.
The Installation Process Step by Step
Pre-Installation Inspection and Prep
Every job starts with a walk-through. A trained crew checks attic access, wiring, and existing insulation depth. They look for gaps that need caulking or weatherstripping before any material goes in. Floors get covered, and work areas are sealed off to protect your home from dust.
Installation Day Walkthrough
Most jobs run in clear stages. The table below shows what a typical day looks like for an average attic project.
| Step | Task | Typical Time |
|---|---|---|
| 1 | Setup and surface protection | 20–30 minutes |
| 2 | Air sealing gaps and penetrations | 30–45 minutes |
| 3 | Loading the blowing machine | 10 minutes |
| 4 | Insulation application | 1–2 hours |
| 5 | Depth check and leveling | 15–20 minutes |
Technicians wear respirators and protective clothing throughout. Safety matters as much as speed.
Post-Installation Cleanup and Inspection
Once the material settles, the crew removes coverings and vacuums up debris. They measure final depth against code targets, then walk the attic again to catch any missed spots. Many homeowners use this visit to ask about LED light bulb replacement or other small repairs too. For more home efficiency tips, check the blog before your appointment.
Cost Factors and Available Savings Programs
Average Cost Ranges and Variables
Most homeowners pay between $1.50 and $3.50 per square foot for a typical attic project. Total cost depends on square footage, attic height, and how much old material needs removal first. Homes with limited access, like tight crawlspaces or steep rooflines, often cost more because labor takes longer.
Material choice also shifts the price. Cellulose tends to cost less than fiberglass, while spray foam sits at the higher end. Adding air sealing, caulking, or weatherstripping before the fill goes in raises upfront costs but boosts long-term savings. Checking a provider’s portfolio helps homeowners compare project scope and expected pricing before committing.
Rebates and Tax Incentives
Federal tax credits can cover up to 30% of insulation costs, capped at $1,200 annually under current energy efficiency rules. Many utility companies also offer rebates for attic insulation upgrades, sometimes ranging from $250 to $1,000 depending on the home’s size and current R-value.
These programs often bundle insulation with other upgrades. Homeowners replacing an old furnace or adding LED light bulb replacement may qualify for combined incentives, lowering total out-of-pocket costs significantly.
Assistance Programs for Income-Eligible Homeowners
New Jersey offers assistance programs that provide free or heavily discounted insulation services to qualifying households. Eligibility usually depends on income level and household size, and plenty of families qualify without even realizing it.
These programs sometimes include related repairs, such as gas leak repair or light home repair, to make sure homes are safe before insulation work begins. Many local businesses help homeowners navigate applications and paperwork.
Maintaining Your Insulation for Long-Term Performance
Inspecting for Settling and Gaps
Loose-fill material can settle over time. That’s normal, but it creates thin spots that weaken performance. Check your attic once a year, ideally before winter. Look for low areas near joists, vents, or hatch openings.
A flashlight and tape measure help you spot uneven coverage. If depth has dropped below the recommended level for your climate zone, it may be time to top off the layer. Homeowners who compare their attic to photos in an installer’s gallery often notice gaps they missed before. Regular inspection catches problems before they cost you comfort or money.
Recognizing Moisture or Pest Damage
Moisture is insulation’s biggest enemy. Watch for clumping, discoloration, or a musty smell in the attic. These signs often point to roof leaks or poor ventilation. Wet insulation loses its R-value fast and needs prompt replacement.
Pests leave clues too. Tunnels, droppings, or nesting material mixed into the fill mean rodents or insects have moved in. Sealing entry points with caulking or weatherstripping helps stop repeat visits after cleanup.
Long-Term Care Tips
Simple habits protect your investment. Keep attic vents clear, fix roof leaks quickly, and avoid storing items directly on top of loose-fill material. Schedule a professional energy audit every few years to measure performance accurately.
Pairing insulation care with small upgrades — like LED light bulb replacement or showerhead and aerator swaps — stretches your energy savings even further across the whole home.
Before committing to new ductwork or a sealing contract, it’s worth asking where your conditioned air is actually going — a duct system can be tight and still leave a house drafty if the attic is under-insulated or the gaps around windows and doors have opened up over the years. A whole-home energy assessment can tell you how much of the problem lives in the envelope versus the ducts, and often the less glamorous fixes like caulking, weatherstripping, and adding attic insulation deliver comfort gains that would otherwise be credited to the duct work. Whatever order you tackle things in, knowing the real source of the loss first tends to save both money and second-guessing later.
