


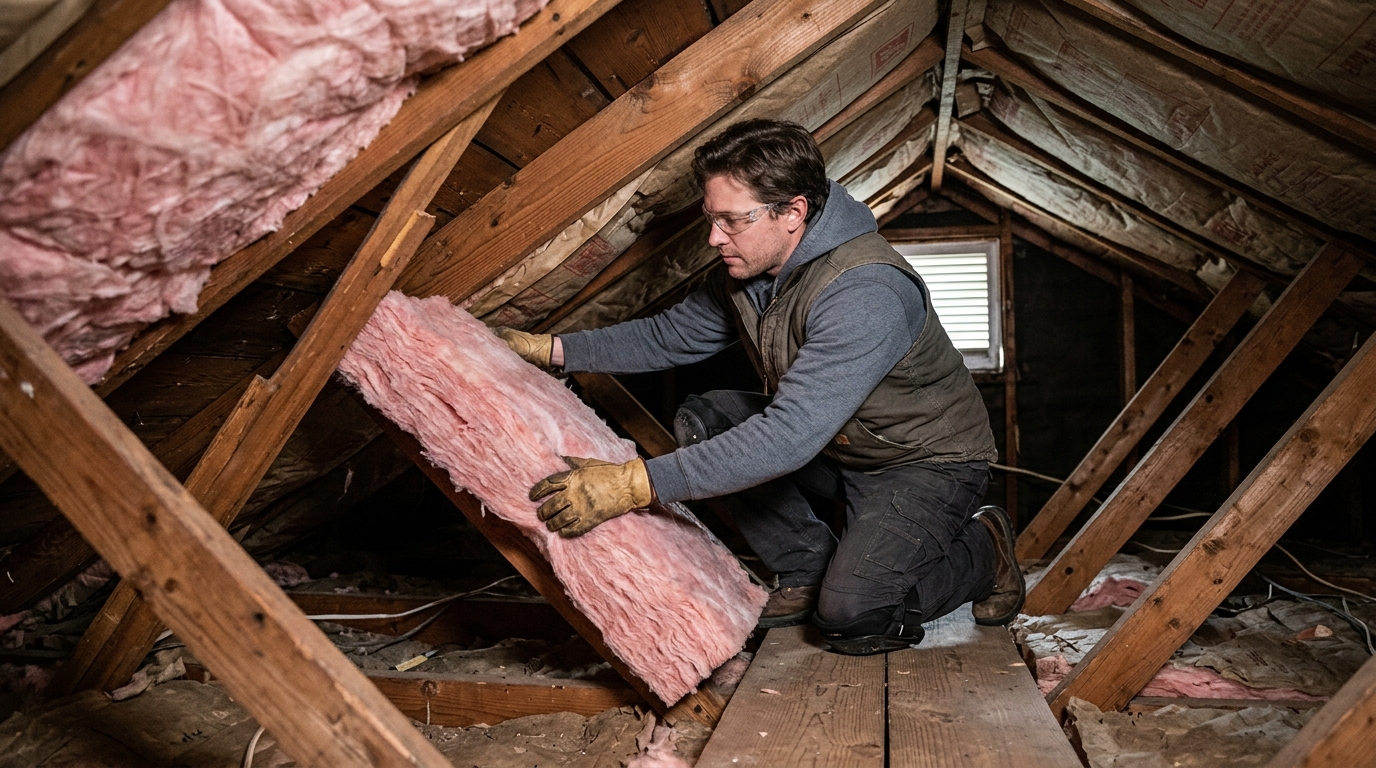
Your energy bills keep climbing even though you’re setting the thermostat lower every winter. The culprit is likely hiding inside your walls, attic, and crawl spaces where you can’t see it. Poor insulation energy efficiency forces your HVAC system to work overtime, wasting hundreds of dollars a year and leaving rooms unevenly heated. This guide breaks down how modern insulation materials, R-values, and installation techniques work together to cut energy waste. It’s backed by the latest 2026 building standards and technology, so you can make smart decisions for your home.
Understanding How Insulation Powers Home Energy Efficiency
What Insulation Is and How It Works
Insulation acts as a thermal barrier between the inside of your home and the outdoor air. It slows the movement of heat, keeping warm air inside during winter and outside during summer. Materials like fiberglass batts, cellulose, and foam boards trap tiny air pockets that resist heat flow.
Without this barrier, your heating and cooling systems work overtime. That extra strain shows up on your monthly bills and shortens equipment lifespan. Insulation is one of many projects to improve energy efficiency homeowners can tackle for lasting comfort.
R-Value Explained
R-value measures a material’s resistance to heat flow. Higher numbers mean better insulating power. A typical attic might need an R-value between 38 and 60, depending on your climate zone.
Thickness and density both affect R-value. Two inches of dense foam can outperform four inches of loosely packed fiberglass. Checking labels helps you compare products fairly before buying.
Local climate guidelines, available through building codes or energy offices, offer specific R-value targets. Meeting these numbers ensures your insulation performs as designed year-round.
How Heat Moves Through a Home
Heat travels three ways: conduction, convection, and radiation. Conduction moves heat through solid materials, like walls. Convection circulates warm air. Radiation transfers heat through open space, such as sunlight through windows.
Gaps around attics, walls, and floors let heat escape or enter unchecked, wasting energy even with good insulation. The Why Seal and Insulate? resource explains why pairing insulation with sealing matters most.
Understanding these pathways shows why comfort and savings depend on more than material alone.
Common Types of Insulation Materials
Not all insulation works the same way. Each material has its own R-value, cost, and best-use case. Choosing the right one is a key decision that affects comfort and utility bills for decades. Homes with old attic insulation types often perform far worse than homes updated with modern materials.
Fiberglass and Mineral Wool
Fiberglass batts remain the most common choice. Mineral wool offers better fire resistance and sound dampening. Both are affordable and widely available.
Spray Foam and Foam Board
Spray foam expands to seal gaps and cracks. Foam board adds rigid, high-R-value protection to walls and foundations.
Cellulose and Blown-In Insulation
Cellulose is made from recycled paper and works well in attics. Blown-in insulation fills tight spaces without major demolition.
- Fiberglass batts are budget-friendly and easy for many local businesses to install quickly.
- Mineral wool resists heat well, making it a smart choice near chimneys or wiring.
- Spray foam creates an air seal, reducing drafts alongside proper caulking and weatherstripping.
- Foam board adds strength to exterior walls without taking up much space.
- Cellulose insulation uses recycled materials, appealing to eco-conscious homeowners.
- Blown-in insulation reaches corners that batts often miss, especially in attic insulation upgrades.
According to research on Energy Savings by Insulation, material choice can change a home’s overall efficiency and long-term savings significantly.
Spray Foam vs. Fiberglass: Which Delivers Better Energy Savings?
Homeowners often narrow their choice down to two materials: spray foam and fiberglass. Each performs differently depending on budget, climate, and the shape of the space being insulated.
Pros and Cons of Spray Foam
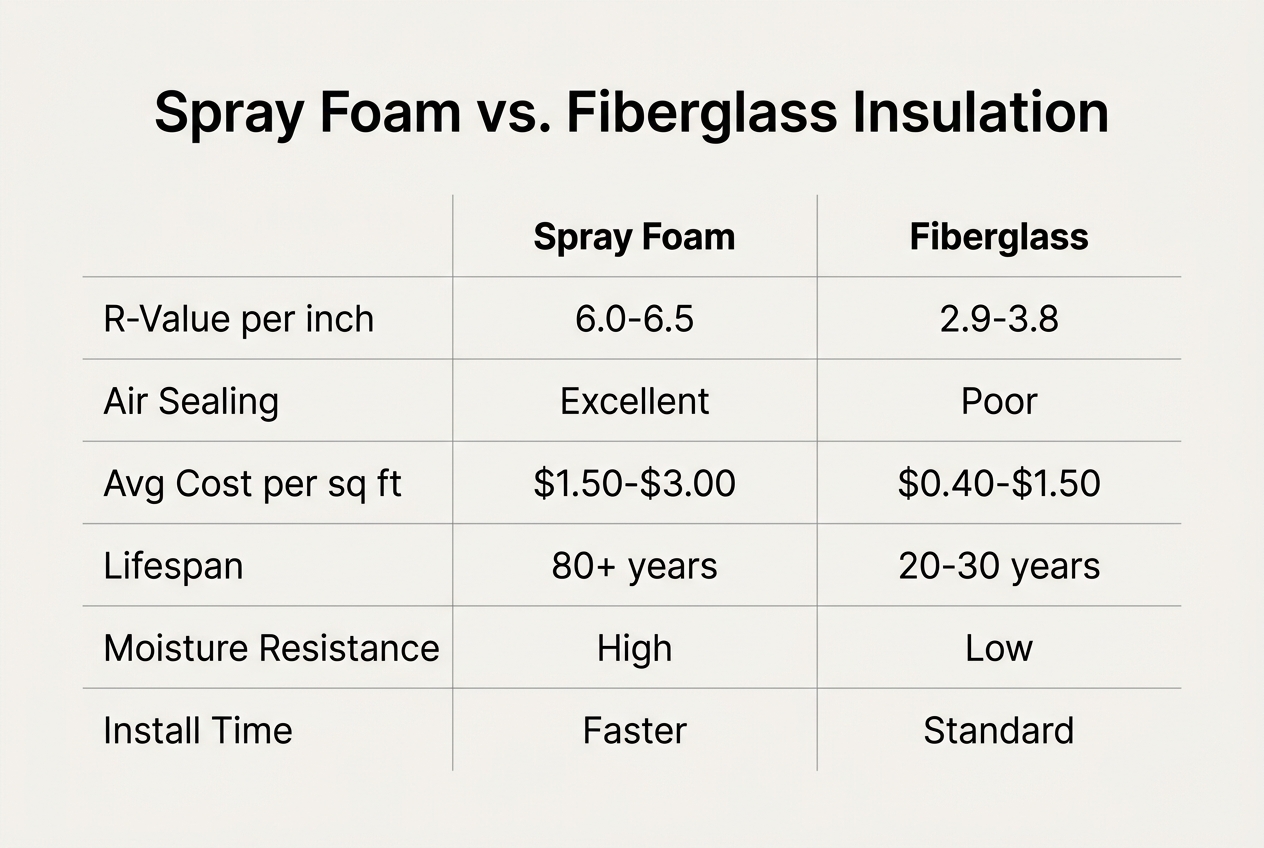
Spray foam seals gaps and air leaks in one step. It offers a high R-value per inch and works well in oddly shaped cavities. Downsides include higher upfront cost and the need for trained installers. Poor application can trap moisture, so quality control matters.
Benefits and Limitations of Fiberglass
Fiberglass batts cost less and are widely available. They install quickly in standard stud spacing. But fiberglass doesn’t stop air leaks on its own. Pairing it with caulking and weatherstripping improves results significantly.
Cost-to-Performance Comparison
| Factor | Spray Foam | Fiberglass |
|---|---|---|
| R-value per inch | 6.0–6.5 | 2.9–3.8 |
| Average cost per sq ft | $1.50–$3.50 | $0.60–$1.20 |
| Air sealing ability | Excellent | Poor alone |
| Installation time | Faster, specialized crew | Moderate, DIY-friendly |
| Lifespan | 80+ years | 20–30 years |
For deeper cost breakdowns by region and project size, review this insulation cost 2026 pricing guide. Many local businesses also recommend reading Top Home Insulation Tips for Maximum Energy Efficiency before choosing a material.
Insulating Different Areas of Your Home
Attic Insulation Priorities
Heat rises, and your attic pays the price. In winter, warm air escapes upward through a poorly insulated ceiling. In summer, trapped heat bakes your top floor. This makes proper attic insulation the single highest-impact upgrade most homes can make. Many older New Jersey homes have only 4 to 6 inches of attic insulation, well below the recommended 12 to 15 inches for our climate zone.
Before adding material, check for air leaks around recessed lighting, chimneys, and attic hatches. Sealing these gaps first prevents wasted effort. Pairing new insulation with caulking and weatherstripping around attic access points stops warm air from sneaking through small cracks. This combined approach works noticeably better than insulation alone.
Wall Insulation Considerations
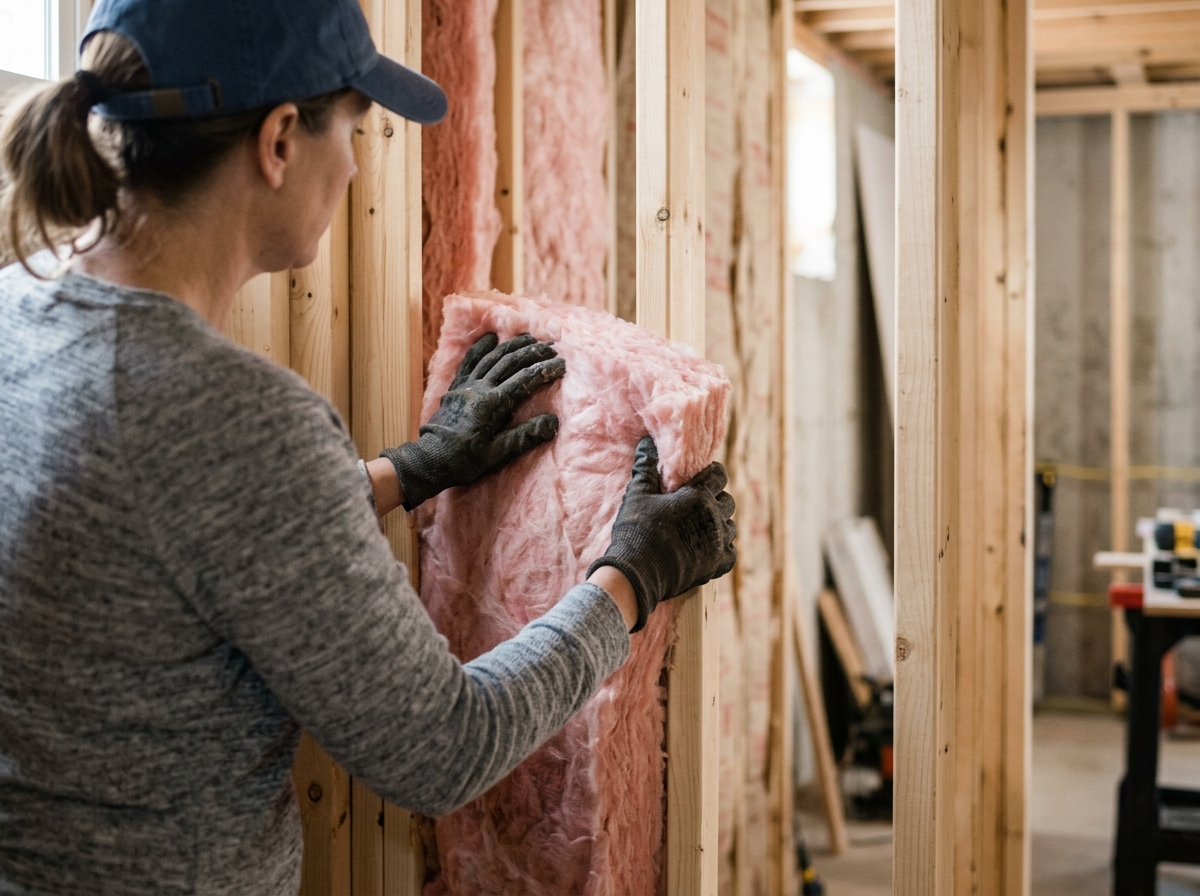
Walls lose less heat than attics but still matter. Older homes built before 1980 often have little or no wall insulation hidden behind plaster or drywall. Blown-in cellulose or foam injected through small holes can fill these cavities without major demolition, making walls a practical upgrade during other renovation projects.
Exterior walls facing north and west typically lose more heat in winter. Homeowners tackling a room addition or siding replacement should treat that moment as a chance to upgrade wall cavities too. Reviewing guidance like Best Insulation Types for Energy Efficiency in 2025 helps homeowners pick materials suited to their specific wall structure.
Basement and Crawl Space Strategies
Moisture is the defining challenge below grade. Basements and crawl spaces trap dampness, which can ruin fiberglass batts and promote mold growth. Rigid foam board or closed-cell spray foam resists water better and holds up reliably in these damp conditions year after year.
Sealing rim joists and foundation cracks stops both air leaks and moisture intrusion at once. Combined with proper drainage and ventilation, this protects your insulation investment. Many local businesses recommend addressing crawl space moisture before installation begins, since insulating over existing dampness only traps problems and shortens the material’s lifespan.
Signs Your Home Needs Better Insulation
Uneven Room Temperatures
Walk through your home on a cold day. Do some rooms feel chilly while others stay warm? That’s a classic sign of insulation gaps. Upstairs bedrooms often run hot in summer and cold in winter when attic insulation is thin or unevenly spread. Drafts near windows and doors also point to weak spots letting conditioned air escape.
Unexplained High Energy Bills
A sudden jump in heating or cooling costs, without any change in habits, often signals hidden heat loss. Use this checklist to spot warning signs:
- Your energy bills climb noticeably each winter or summer despite steady thermostat settings.
- Your furnace or air conditioner runs constantly but struggles to reach the set temperature.
- You feel cold air near electrical outlets or light switches on exterior walls.
- Pipes feel unusually cold, or you notice frost on interior walls during winter months.
- Ice dams form along your roofline, hinting at escaping heat melting snow above the attic.
Visible Damage or Gaps in the Attic
Grab a flashlight and inspect your attic for compressed, damp, or missing insulation. Check for gaps around vents, pipes, and the attic hatch. The PATH | Insulation and Air Sealing guide outlines recommended depths for most climates. For a deeper look, this attic insulation vacuum necinj guide explains removal and replacement options. When in doubt, schedule a professional energy audit to find out what’s really happening behind your walls.
Cost Considerations for Home Insulation Projects
Insulation costs vary widely by material, thickness, and installation method. Knowing the price range helps you budget before calling a contractor. The table below shows typical costs per square foot, installed.
| Insulation Type | Cost per Sq. Ft. | Best Use |
|---|---|---|
| Fiberglass batts | $0.64–$1.19 | Walls, attics |
| Blown-in cellulose | $1.00–$1.50 | Attic insulation, retrofits |
| Open-cell spray foam | $1.50–$2.50 | Walls, rim joists |
| Closed-cell spray foam | $2.50–$4.50 | Basements, crawl spaces |
| Rigid foam board | $1.50–$2.00 | Exterior sheathing |
New Homes vs. Existing Home Retrofits
New construction costs less overall. Builders install insulation before drywall goes up, with no demolition needed. Retrofits cost more because crews must open walls, drill holes, or squeeze into tight attics. A retrofit project often runs 20-30% higher than the same job during new construction.
Financial Incentives and Rebate Programs
Many states offer rebates for insulation upgrades, weatherstripping, and caulking. Some programs bundle insulation with home appliance replacements for bigger combined savings. Check the Savings | Value of Insulating Your Home resource for national averages. Local utility companies often provide separate rebates, too. Stacking incentives can cut your out-of-pocket cost significantly.
DIY vs. Professional Insulation Installation
DIY Insulation Tips and Limitations
Some insulation tasks are safe for confident homeowners. Adding batts to an easily accessible attic floor, sealing gaps with caulking, or installing weatherstripping around doors are all manageable weekend projects. These small upgrades pair well with other simple fixes, like LED light bulb replacement or showerhead and aerator replacement, which also cut energy waste.
Still, DIY has real limits. Blown-in cellulose, spray foam, and wall-cavity work require special equipment and training. Tight crawl spaces, knob-and-tube wiring, or old ductwork raise risks fast. A rushed job can trap moisture, block vents, or leave gaps that undo your savings. Learning more about Insulation and Air Sealing helps homeowners understand what a full, effective job actually involves.
When to Call a Professional Installer
Certain jobs demand licensed help. Attic insulation involving vapor barriers, ventilation baffles, or recessed lighting clearances needs trained hands. Homes with knob-and-tube wiring, asbestos-era materials, or suspected gas leak repair issues should never be handled solo. A professional also knows how to balance insulation upgrades with future plans, such as home appliance replacements or figuring out whether are solar panels worth it for your household.
Complex projects, like whole-house energy audits or multi-room retrofits, benefit from professional judgment. Installers spot hidden air leaks, moisture problems, and structural quirks that untrained eyes miss. Many local businesses combine insulation work with light home repair, offering a more complete, coordinated upgrade in one visit.
Safety and Code Compliance Factors
Improper installation creates real hazards. Compressed insulation loses R-value. Blocked soffit vents cause moisture buildup and mold. Insulation placed too close to chimneys, flues, or recessed lights can become a fire risk. Local building codes set minimum clearances and material standards for good reason.
Licensed installers understand these codes and carry the right safety gear, including respirators for fiberglass or cellulose dust. They also know local permit requirements, which vary by township. Skipping these steps can void warranties, fail inspections, or create long-term safety concerns homeowners never anticipated.
Eco-Friendly and Sustainable Insulation Options
Natural Fiber Insulation
Homeowners seeking greener choices often turn to natural fiber insulation. Sheep’s wool, cotton, and hemp are common options. These materials resist mold and pests naturally, without heavy chemical treatments. Wool, for example, can absorb moisture and release it slowly, helping regulate humidity in walls and attics.
Cotton insulation, often made from recycled denim, offers solid thermal performance. It typically reaches an R-value between 3.0 and 3.7 per inch, similar to fiberglass. It also handles sound dampening well, a bonus for busy households near roads or shared walls.
These materials cost more upfront than traditional options. But many homeowners see the tradeoff as worthwhile, given the reduced environmental footprint and healthier indoor air.
Recycled and Upcycled Materials
Recycled materials give old products new life. Cellulose insulation, made from shredded newspaper treated with fire retardant, is one of the most widely used green options. It’s dense, affordable, and effective at filling attic spaces and wall cavities.
Recycled plastic and glass fibers also show up in modern insulation products. These materials divert waste from landfills while delivering dependable thermal resistance. Some manufacturers now blend recycled denim, wool, and even mushroom-based materials into panels designed for easy installation.
Choosing recycled insulation supports broader sustainability goals. It reduces manufacturing energy demands compared to virgin materials, cutting the carbon footprint of a renovation project significantly.
Environmental Impact vs. Performance Tradeoffs
Sustainable insulation isn’t always a perfect match for every budget or climate. Natural fibers may cost 20 to 40 percent more than fiberglass. Homeowners must weigh upfront costs against long-term energy savings and environmental benefits.
Performance also varies by moisture exposure and installation quality. Pairing any insulation with proper caulking and weatherstripping boosts its effectiveness. Reviewing energy saving tips for summer can help homeowners get the most out of any material, year-round. Ultimately, sustainable insulation supports both comfort and conservation when matched to the right space.
Maximizing Insulation Energy Efficiency Through Proper Sealing
Air Sealing Basics
Air sealing stops conditioned air from escaping through gaps and cracks. Insulation alone can’t do this job. Think of insulation as a blanket and air sealing as the zipper that keeps drafts out. Without both, heated or cooled air slips away, forcing your HVAC system to work harder.
Caulking and weatherstripping are the two main tools for this task. Caulking fills small, permanent gaps around windows, pipes, and trim. Weatherstripping seals moving parts, like doors and operable windows. Together, they can cut air leakage by 10 to 20 percent, according to many energy studies — enough to make a real dent in monthly utility bills.
Common Leak Points to Target
Most homes lose air through predictable spots. Attics, recessed lighting, electrical outlets, and chimney chases rank among the worst offenders. Basement rim joists and crawl space openings also let outside air sneak in. Even small light home repair fixes, like patching a cracked outlet cover, add up over a year.
Plumbing penetrations deserve special attention too. Areas near a showerhead and aerator replacement often have gaps where pipes pass through walls. Sealing these spots, alongside upgrading attic insulation, tackles two efficiency problems at once and guards against moisture damage.
Combining Insulation with Ventilation
A tightly sealed home still needs fresh air. Proper ventilation prevents moisture buildup, mold, and stale indoor air. This balance matters just as much as choosing materials or comparing solar panels benefits and disadvantages for a broader energy plan.
Exhaust fans, ridge vents, and mechanical ventilation systems work with insulation, not against it. Many local businesses now pair sealing projects with LED light bulb replacement and appliance upgrades for a whole-home approach. This combined strategy delivers steadier temperatures, lower bills, and healthier air year-round.
How Better Insulation Lowers Bills and Boosts Comfort
Reducing Heating and Cooling Costs
Proper insulation is one of the most effective forms of energy conservation a home can have. Homes with upgraded insulation can cut heating and cooling costs by 10 to 20 percent. Pairing insulation with attic upgrades and sealing gaps often pushes savings even higher, especially in older homes with drafty attics and walls.
Enhancing Year-Round Indoor Comfort
Good insulation does more than save money. It keeps rooms feeling steady and pleasant in every season. Consider these everyday improvements:
- Bedrooms stay warmer on cold nights without cranking up the thermostat.
- Upstairs rooms no longer trap uncomfortable heat during summer months.
- Cold floors and drafty corners become noticeably less noticeable.
- Noise from outside traffic or neighbors is reduced significantly.
- Temperature swings between rooms level out for a more even feel.
Long-Term Return on Investment
Insulation pays for itself over time through lower bills and fewer repairs. It also supports better indoor air quality by limiting moisture, mold, and outdoor pollutants that sneak through gaps. Combined with light home repair, caulking, or weatherstripping, insulation offers a lasting return that grows stronger every year.
Getting Started: Energy Audits and Assistance Programs
What Happens During a Home Energy Audit
A professional energy audit is the first real step toward a more efficient home. A trained technician inspects your attic insulation, checks for drafts near windows and doors, and tests for gas leaks. They often use a blower door test to measure air leakage and an infrared camera to spot hidden heat loss.
The audit also reviews your appliances, lighting, and water fixtures. Many local businesses look for opportunities like LED light bulb replacement or showerhead and aerator replacement, since these small changes add up. You’ll receive a detailed report ranking which upgrades offer the biggest energy savings for your budget.
Qualifying for Free or Discounted Services
Income-eligible households may qualify for free or heavily discounted services through state-run assistance programs. These programs typically cover attic insulation, caulking, weatherstripping, and even minor light home repair needed to prepare a home for upgrades. Eligibility usually depends on household size and income level, so it’s worth checking before assuming you won’t qualify.
Some programs extend further, offering home appliance replacements for outdated refrigerators or water heaters that waste energy. Applying is often simpler than homeowners expect, requiring basic income documentation and a scheduled visit. You can learn more by reading the about us page of a qualified provider.
Planning Your Insulation Upgrade Project
Once your audit results arrive, prioritize the recommendations with the fastest payback. Attic insulation and air sealing usually top the list, since they address the biggest sources of heat loss in most homes. Set a realistic timeline and budget before contacting contractors.
Ask providers about combining insulation work with weatherstripping or gas leak repair for better long-term results. Planning ahead helps you avoid repeat visits and makes sure every upgrade works together efficiently.
Frequently Asked Questions About Home Insulation
What Insulation Type Is Best for My Home?
There’s no single answer. The right choice depends on your climate, budget, and the area you’re insulating. Attic insulation often needs a higher R-value than wall insulation because heat rises. A home energy professional can review your specific needs through our services and recommend materials that match your house’s construction and age.
How Do I Know If My Insulation Needs Upgrading?
Several warning signs point to failing or outdated insulation. Watch for these common clues:
- Your energy bills climb steadily each winter or summer despite normal usage habits.
- Rooms feel drafty near windows, doors, or outlets even when they’re closed.
- Your attic insulation looks thin, compressed, or discolored from moisture damage.
- Pipes have frozen in past winters, suggesting cold air is reaching areas it shouldn’t.
- Pests or rodents have nested in wall cavities, a sign insulation has gaps.
Are There Incentives to Help Cover Costs?
Yes. Many rebate programs exist for income-eligible households, covering upgrades like weatherstripping, caulking, and LED light bulb replacement alongside insulation work. These programs lower upfront costs significantly, sometimes covering the full project for qualifying homes.
If you’re ready to stop losing money through poorly insulated walls and attics, the team at NECINJ can help you find real solutions—Northeast Energy Conservation, Inc. offers thorough energy audits and insulation services, and even connects income-eligible households with free upgrades through the New Jersey Comfort Partners Program. Visit their site to learn more or book an energy audit today, and take that first comfortable step toward a more efficient home.
