


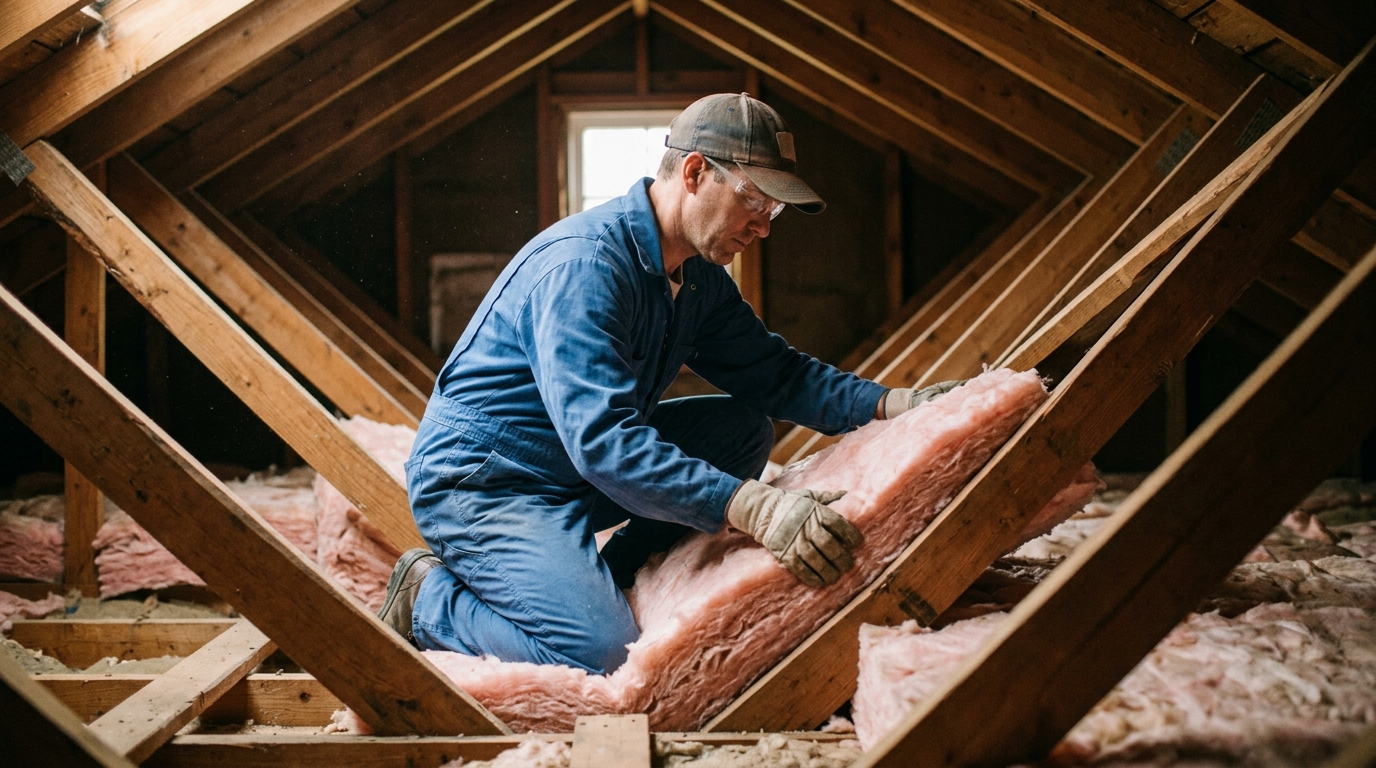
Every winter, homeowners across New Jersey watch their heating bills climb while cold air seeps through walls, attics, and crawl spaces that were never properly sealed. Poor or outdated insulation installation is often the hidden culprit behind uneven room temperatures, ice dams, and utility costs that keep rising year after year. NECINJ put together this guide to help you understand what quality insulation installation really involves, which materials and R-values make sense for your home, and how to evaluate contractors so you get lasting comfort and real energy savings in 2026 and beyond.
Why Proper Insulation Matters for Your Home
Signs Your Home Needs Better Insulation
Many homes leak energy without any obvious warning sign. A drafty room, cold floors, or an attic hatch that feels icy in winter are all clues. If certain rooms never seem to match the thermostat setting, gaps in your insulation are likely the reason.
Ice dams along the roofline, high humidity in the basement, and pests finding their way indoors point to weak spots too. Homeowners often notice these issues alongside smaller problems, like drafty windows that need caulking or weatherstripping. Together, these signs suggest your home’s thermal barrier isn’t doing its job.
How Insulation Affects Utility Bills
Heating and cooling eat up a large share of the average utility bill. When insulation is thin or missing, that energy simply escapes. Attic insulation upgrades alone can cut heating and cooling costs by 10 to 15 percent in many homes, according to industry estimates.
Poor insulation forces furnaces and air conditioners to run longer, adding wear and shortening equipment life. Some homeowners consider bigger investments, like asking whether are solar panels worth it, without fixing basic envelope problems first. Insulation upgrades usually pay back faster and cost far less upfront.
Insulation’s Role in Indoor Air Quality
Insulation doesn’t just hold temperature steady. It also affects indoor air quality. Gaps and poorly sealed cavities let in dust, allergens, and outside pollutants. In humid climates, poor insulation can even lead to condensation and mold growth inside walls.
Proper insulation, paired with a solid air barrier, helps control moisture and keeps indoor air cleaner. Many people wonder if this is a project they can tackle alone; one detailed discussion, Insulation installation. Should I do it myself?, explains why professional assessment often matters for health and performance alike.
Understanding Insulation Materials and R-Values
R-value measures how well a material resists heat flow. Higher numbers mean better insulating power. New Jersey’s climate calls for attic R-values around R-49 and wall R-values near R-13 to R-21, depending on the home’s age and layout.
Batt and Roll Insulation
Fiberglass or mineral wool batts are the most common choice. They fit neatly between studs and joists, making them a practical option for many local businesses handling standard remodels.
Blown-In and Loose-Fill Options
Cellulose or fiberglass loose-fill works well for irregular attic spaces. It fills gaps that batts can’t reach, which pairs nicely with energy saving tips for summer cooling strategies.
Spray Foam and Rigid Board
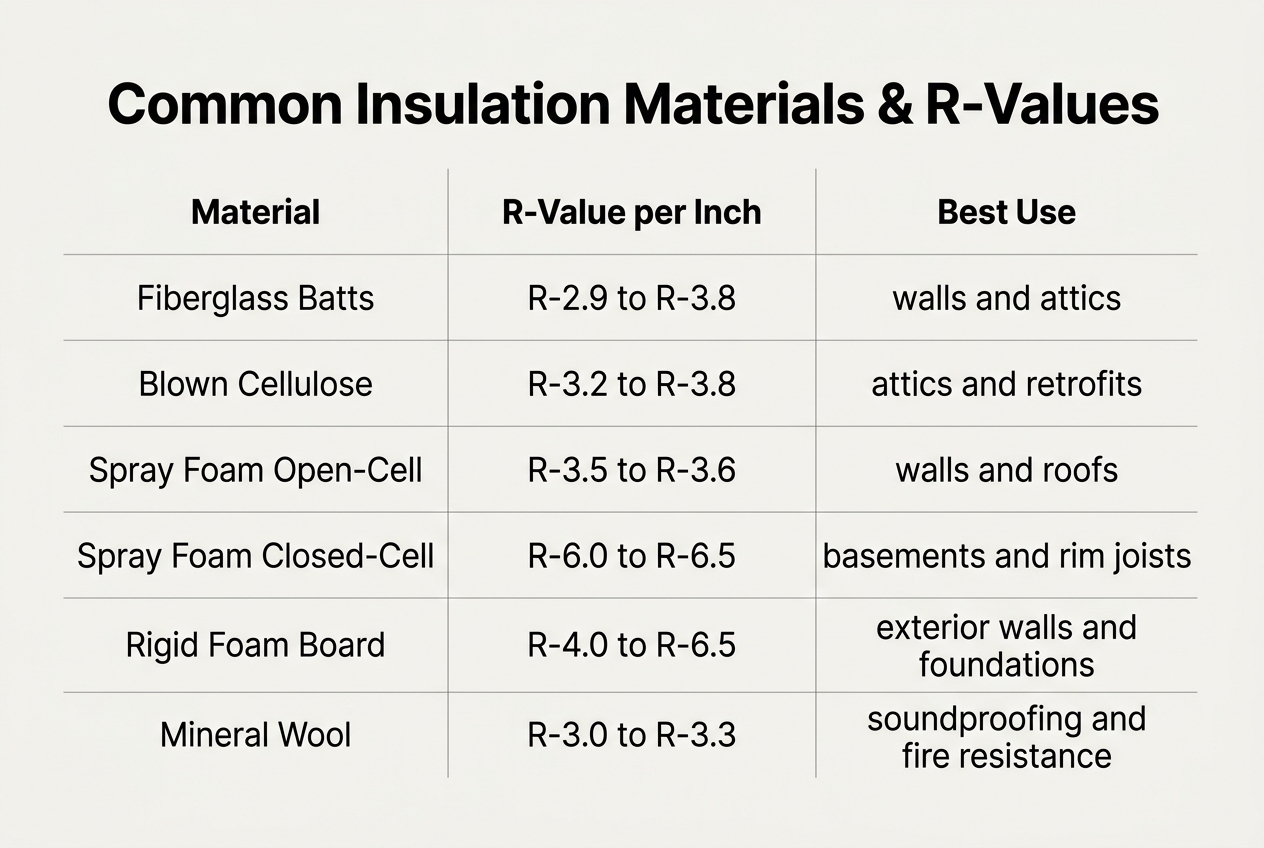
Spray foam seals cracks and adds a strong air barrier. Rigid board suits basements and foundations. Below is a quick comparison of common materials.
| Material | Typical R-Value per Inch | Best Use |
|---|---|---|
| Fiberglass Batt | R-2.9 to R-3.8 | Walls, floors |
| Blown Cellulose | R-3.2 to R-3.8 | Attics, tight spaces |
| Spray Foam | R-3.6 to R-6.5 | Sealing air leaks |
| Rigid Foam Board | R-4 to R-6.5 | Basements, exterior walls |
For attic-specific projects, resources like Attic Insulation Installation guides explain material depth and coverage requirements clearly.
Where Insulation Installation Makes the Biggest Impact
Attics and Rooflines
Heat rises, so the attic is usually the top priority in any home. Without enough attic insulation, warm air escapes in winter and hot air seeps in during summer. Most older homes have only a few inches of insulation where twelve to fifteen inches are recommended. Upgrading this one area often delivers the fastest return on comfort and cost savings.
Rooflines matter too, especially in homes with finished attic rooms or cathedral ceilings. These sloped spaces need careful attention, since gaps here create year-round drafts. Reviewing Residential insulation: Preparing for Your Installation helps homeowners understand what proper coverage looks like before work begins.
Exterior Walls and Rim Joists
Exterior walls hold real heat loss potential, particularly in homes built before 1980. Many still have thin or settled insulation inside wall cavities. Rim joists, the band circling the top of a foundation, get overlooked entirely too often. These narrow gaps let cold air pour into basements and first floors.
Sealing and insulating rim joists is a small job with a big payoff. It’s one of several projects to improve energy efficiency that homeowners can tackle alongside caulking and weatherstripping around windows and doors.
Crawl Spaces and Basements
Basements and crawl spaces sit below grade, so they’re easy to ignore. Yet uninsulated foundation walls and floors above crawl spaces can account for a large share of a home’s heat loss. Moisture problems often make matters worse, damaging insulation over time.
Overlooked spots like duct chases, sill plates, and pipe penetrations quietly leak conditioned air. Addressing these areas alongside light home repair work creates a tighter, more efficient building envelope from top to bottom.
Preparing Your Home Before Installation Begins
Conducting a Pre-Installation Walk-Through
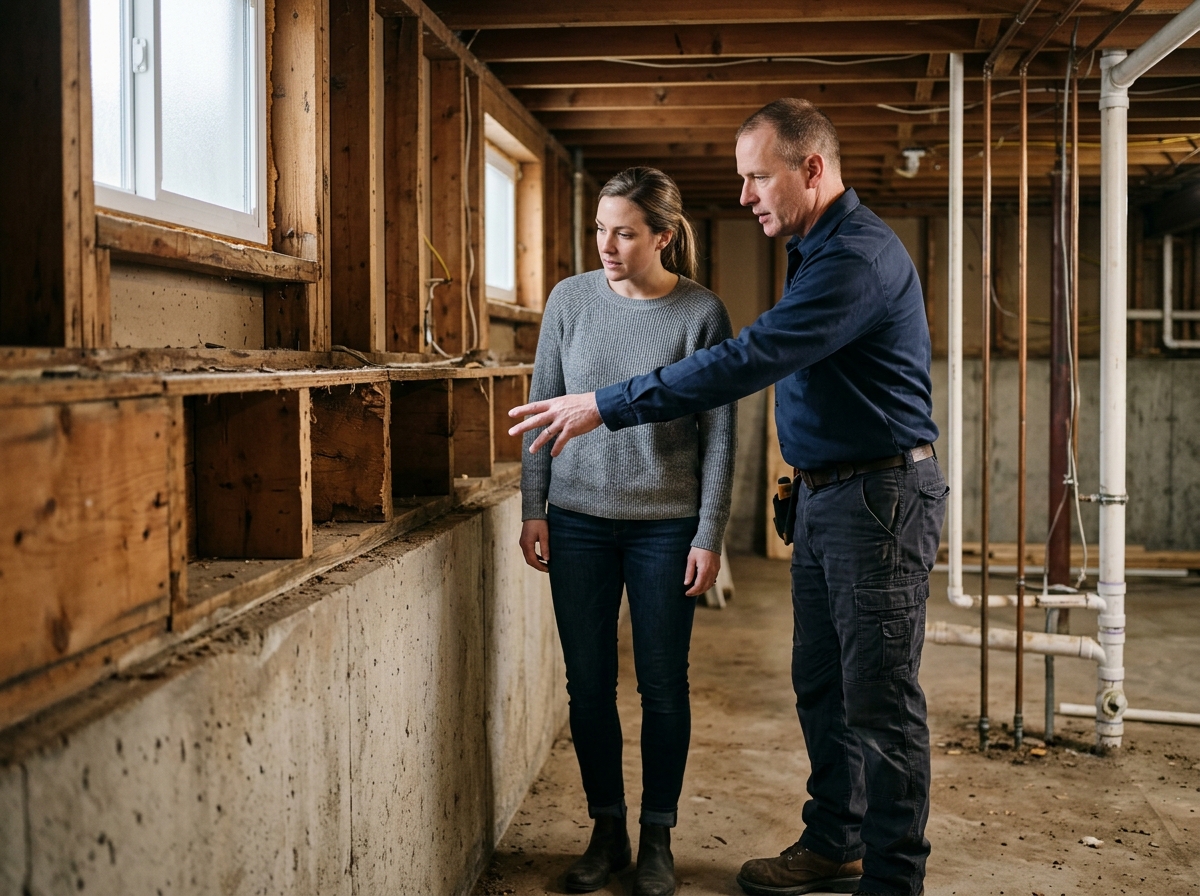
Good results start long before crews arrive. A pre-installation walk-through lets you and the installer inspect attics, crawl spaces, and walls together. This step catches problems early, like blocked vents or damaged framing, so nothing surprises anyone mid-job.
During the walk-through, note existing attic insulation depth, wall cavity access points, and any areas with visible sagging or gaps. Homeowners often spot small issues here too, like a loose light fixture or minor drywall damage, that fall under light home repair rather than insulation work itself.
Taking photos and measurements during this stage gives you a clear baseline. You can compare it later to confirm the new insulation actually filled gaps and reached proper depth throughout the space.
Identifying Air Leaks and Moisture Sources
Insulation only performs well when moisture and air leaks are controlled first. Damp insulation loses much of its R-value, sometimes over 40 percent, so finding leaks matters as much as choosing the right material.
Check basements, attics, and around plumbing for staining, mold, or musty odors. Common culprits include roof leaks, poor grading, and gaps around pipes. Caulking and weatherstripping around windows, doors, and penetrations stop drafts before new insulation goes in, which prevents trapped condensation later.
Gas leak repair should also be handled before installation, since crews need safe, dry access to walls and mechanical areas. Addressing these issues first protects your investment and keeps the workspace safe.
Scheduling an Energy Audit First
An energy audit pinpoints exactly where a home loses heat, using tools like blower doors and infrared cameras. This data guides decisions on material type, thickness, and placement, rather than guessing based on age or appearance alone.
Many local businesses bundle audits with related upgrades, including appliance replacements, showerhead and aerator swaps, and LED light bulb replacement, to maximize overall savings. Reviewing our services beforehand helps homeowners understand what a full assessment typically includes.
For visual learners, the Residential Insulation: Installation Guides series shows real audit findings and prep work, making the whole process easier to picture before installation day arrives.
Insulation Installation: A Step-by-Step Overview
Air Sealing Before Insulating
Every solid job starts with sealing gaps, not laying material down. Crews check for drafts around wiring holes, plumbing chases, and attic hatches. Caulking and weatherstripping close small leaks before any insulation goes in. Skipping this step wastes money, since air still moves through and around the material anyway. Our about us page explains how this fits into a broader home performance approach.
Placing and Fitting Insulation Correctly
Once the space is sealed, the real work begins. Correct placement matters more than the product itself. A typical sequence includes:
- Measuring each bay or cavity so batts or boards fit snugly without gaps or compression;
- Cutting material cleanly around outlets, pipes, and framing rather than stuffing it in;
- Layering loose-fill insulation to a consistent depth using a calibrated blower;
- Protecting recessed lights and combustion equipment with proper clearances;
- Installing a vapor retarder where local building codes require one.
This guide on How to Install Insulation offers a helpful visual reference for these steps.
Final Inspection and Grade Verification
The last stage confirms quality. Installers check depth markers, look for compressed or missing sections, and verify R-values match the plan. Many technicians grade the job against national standards, rating it as Grade I, II, or III. A Grade I rating means gaps and voids are minimal. This final check protects your investment and confirms the insulation will perform as expected for years.
Building an Effective Air Barrier System
Sealing Penetrations and Seams
Insulation slows heat flow, but it cannot stop moving air. Air leaks carry heated or cooled air straight outside, wasting energy no matter how much insulation sits nearby. That’s why sealing gaps comes first. Common trouble spots include electrical outlets, plumbing penetrations, recessed lighting, attic hatches, and where walls meet the foundation.
Caulking handles small, fixed gaps around window frames and pipes. Weatherstripping seals moving parts like doors and operable windows. Spray foam fills larger, irregular gaps around wiring and duct penetrations. For beginners tackling seams themselves, guides like How To Hang Insulation The Easy Way For Beginners offer practical, step-by-step tips.
Vapor Barriers vs Air Barriers
These two terms get confused often, but they do different jobs. An air barrier blocks air movement through walls, floors, and ceilings. A vapor barrier controls water vapor diffusion, which prevents condensation inside wall cavities. Some materials, like certain rigid foam boards, handle both jobs at once.
Climate matters here. In colder regions, vapor barriers usually go on the warm, interior side of the wall. Installing one on the wrong side can trap moisture and cause rot or mold. A qualified installer evaluates your home’s climate zone and construction before choosing materials.
Combining Air Sealing With New Insulation
Fresh insulation performs best when air sealing happens first. Attic insulation installed over unsealed gaps still lets conditioned air escape, undermining the whole investment. Sealing first, then insulating, delivers the full expected energy savings.
Many local businesses bundle these services with related upgrades, including LED light bulb replacement and showerhead and aerator replacement, for whole-home efficiency gains. Before scheduling work, review a company’s privacy policy to understand how your home assessment data gets used and protected.
DIY Installation vs Hiring a Professional
When DIY Makes Sense
Small jobs suit confident homeowners just fine. Sealing rim joists, adding weatherstripping, or caulking window trim are manageable weekend tasks. Simple attic insulation top-ups, using pre-cut batts, can also work if access is easy and the space is small.
Risks of Improper Installation
Bigger jobs carry real risk. Compressed batts lose R-value. Gaps around wiring create cold spots and moisture pockets. Blown-in cellulose near recessed lights can become a fire hazard if clearances aren’t followed. Skin and lung irritation from fiberglass are common without proper gear.
Benefits of Certified Installers
Certified crews bring training, blower-door testing, and manufacturer-backed warranties. Many local businesses combine insulation work with related upgrades, from showerhead and aerator replacement to LED light bulb replacement, during the same visit. Before deciding, weigh how each option stacks up over time.
| Factor | DIY | Professional |
|---|---|---|
| Upfront Cost | $0.50–$1 per sq ft (materials) | $1.50–$3.50 per sq ft (materials + labor) |
| Time Needed | 1–3 weekends | 1 day, typically |
| Warranty Coverage | None, usually | 5–25 years, workmanship included |
| Safety Equipment Required | Respirator, gloves, eye protection | Provided by crew |
| Long-Term Energy Savings | Variable, depends on technique | Consistent, verified by testing |
For questions about which route fits your project, reach out through contacts before scheduling any work.
What Determines Insulation Installation Cost
Several factors shape the final price tag. Material choice, home size, labor rates, and access all play a role. Material type often matters most, since some products cost more per square foot but perform better over time.
Cost by Insulation Type
Prices vary widely by material. The table below shows typical national ranges per square foot, installed.
| Insulation Type | Cost per Sq. Ft. | Best Use Area |
|---|---|---|
| Fiberglass Batt | $1.00–$1.50 | Attics, walls |
| Blown-In Cellulose | $1.20–$2.10 | Attics, existing walls |
| Spray Foam | $1.50–$5.00 | Rim joists, crawl spaces |
| Rigid Foam Board | $1.50–$2.50 | Basements, exterior walls |
Labor and Home Size Factors
Labor typically adds 40–60% to material costs. A 1,500-square-foot attic project may run $1,500 to $4,500 total. Tight crawl spaces, steep rooflines, and older homes needing light repair work before installation can raise labor time and cost.
Estimating Payback Through Energy Savings
Attic insulation often pays for itself within three to seven years through lower heating and cooling bills. Pairing it with caulking, weatherstripping, and LED bulb upgrades speeds up that payback even more. Many homeowners track these savings by reading energy-focused articles on a trusted blog before starting a project.
Financial Assistance and Energy Programs
State and Utility Rebate Programs
Many homeowners qualify for rebates that offset insulation costs. State and utility programs often reward energy-saving upgrades with cash back or reduced project pricing. Reviewing a completed portfolio of past projects can help you see which upgrades typically qualify.
- Utility-sponsored rebates that cover a percentage of attic insulation costs.
- State energy efficiency programs offering fixed cash incentives per project.
- Manufacturer rebates tied to specific insulation materials or R-value thresholds.
- Seasonal promotions that reduce costs for weatherstripping and air-sealing work.
- Tax credits available for qualifying home performance improvements.
Qualifying for Income-Eligible Assistance
Income-based programs help households reduce upfront costs. Eligibility usually depends on household size and income compared to state guidelines. Many local businesses partner with these programs to provide free or low-cost services, including insulation, light home repair, and appliance replacements for qualifying homes.
Combining Incentives With Renewable Upgrades
Pairing insulation rebates with renewable energy incentives can multiply your total savings. Solar installations, efficient appliances, and LED lighting often qualify for separate programs. Stacking these incentives lowers the overall investment needed for a full home energy upgrade, making comprehensive improvements more affordable over time.
Maintaining Insulation Performance Over Time
Insulation does not last forever. Even quality materials lose effectiveness when compressed, soaked, or chewed by pests. Routine maintenance keeps your home efficient and protects your original investment. A little attention each year can prevent costly surprises later.
Annual Inspection Checklist
Set aside one afternoon a year to check your attic, basement, and crawlspaces. This simple habit catches small problems early.
- Check attic insulation depth to confirm it still meets the recommended level for your climate zone.
- Look for flattened or shifted insulation near vents, hatches, and storage areas.
- Inspect exterior walls and windows for drafts, often linked to failing caulking or weatherstripping.
- Scan for water stains on ceilings or rafters, which signal roof leaks affecting insulation below.
- Test light fixtures and outlets for airflow, since gaps here often need sealing alongside LED light bulb replacement projects.
Dealing With Moisture and Pest Damage
Moisture is insulation’s biggest enemy. Wet fiberglass or cellulose loses its insulating power and can grow mold within days. Rodents and insects also compress or shred material, creating nesting tunnels that destroy coverage. Address plumbing leaks, poor ventilation, and gaps around pipes quickly. Combining insulation upkeep with light home repair tasks, like sealing entry points, helps prevent repeat infestations.
Knowing When to Upgrade or Replace
Rising energy bills, uneven room temperatures, or visible damage all suggest it’s time for new attic insulation. Homes older than 20 years, or those recently renovated, often benefit from an upgrade. Browse a project gallery to see how modern materials turn older, drafty homes into comfortable, efficient spaces.
Getting Started With a Trusted Energy Partner
Scheduling a Home Energy Assessment
Every successful project starts with a clear picture of your home’s needs. A professional energy assessment measures air leaks, checks existing insulation levels, and identifies problem areas like attics, rim joists, and crawl spaces. Auditors often use tools like blower doors and infrared cameras to spot hidden gaps that homeowners miss.
Book your assessment before winter or summer peaks, when contractors have more scheduling flexibility. Many local businesses offer these evaluations at low cost or free through utility partnerships. The results give you a prioritized action list, so your money goes toward fixes with the biggest payback, such as sealing attic bypasses or upgrading weatherstripping around doors.
Questions to Ask Before Hiring an Installer
Before signing a contract, ask about licensing, insurance, and experience with your specific insulation type. Request references from recent jobs and ask how they handle ventilation, moisture control, and cleanup. A trustworthy installer explains their process clearly, including how they’ll approach Insulation Installation & Replacement for your particular attic or wall cavity.
Confirm written estimates, warranty terms, and expected timelines before work begins. Ask whether they also handle related issues, like gas leak repair or minor structural repairs, since bundling services can save time and money. Choosing skilled, transparent help protects your investment and ensures lasting comfort, safety, and energy savings for years ahead.
If your home is due for better insulation, the team at NECINJ (Northeast Energy Conservation, Inc.) can help you find the right solution, starting with a thorough energy audit to see exactly where your home is losing comfort and money. They even participate in the New Jersey Comfort Partners Program, offering free services to income-eligible customers, so quality insulation is within reach for more households. Visit NECINJ online or book your energy audit today to get started on a warmer, more efficient home.
